Author: Patch

  • How to Fix Maytag Dishwasher Error 3-2

    How to Fix Maytag Dishwasher Error 3-2

    Problem: Shorted thermistor/OWI sensor

    How to Fix Dishwasher Error

    1. Disconnect power at the circuit breaker.
    2. Remove the lower access panel.
    3. Locate the turbidity sensor (OWI) near the wash arm assembly.
    4. Disconnect the electrical connector from the sensor.
    5. Test sensor resistance with a multimeter (should not read zero ohms).
    6. If the sensor is shorted, remove mounting screws securing it to the tub.
    7. Clean the sensor lens with vinegar solution and soft cloth.
    8. If cleaning doesn’t resolve the issue, install the new OWI sensor assembly.
    9. Reconnect the electrical connector.
    10. Run a diagnostic cycle to verify sensor operation.

    As an Amazon Associate, we earn from qualifying purchases through links on this page.

    Still Not Working?

    If the replacement part didn’t fix the issue, you may have a wiring problem or main board failure.

    Browse all Maytag error codes: Maytag Error Codes

    When It’s Better to Replace Than Repair

    Sometimes replacing an appliance makes more financial sense than putting more money into repairs.
    Here are a few signs it may be time to shop for a new one:

    • Appliance over 8-10 years old
    • Repair cost over 50% of replacement
    • Multiple recent breakdowns
    • Major component failure

    Recommended Replacement Options

    Budget Option

    Top Rated Washers Under $600

    • Amazon’s Highest-Rated Value Models
    • Free ‘Room of Choice’ Delivery Available
    • Professional Haul-away Options at Checkout


    View Top Rated Models & Delivery Options

    Mid-Range Option

    Top Rated Washers $600 to $1,000

    • Best-Sellers with Thousands of 5-Star Reviews
    • Expert Installation & Hookup Services available
    • Protection Plans for Long-Term Peace of Mind


    View Top Rated Models & Delivery Options

    Premium Option

    Top Rated Washers Over $1,000

    • Top-of-the-Line Performance & Technology
    • White-Glove Delivery and Haul-away eligible
    • Comprehensive Warranty & Support Options


    View Top Rated Models & Delivery Options

    Why Upgrade via Amazon?

    • Fast, Scheduled Delivery – You pick the date and time
    • Expert Installation – Professional setup available for most models
    • Old Appliance Haul-away – They’ll take your broken unit when they leave
    • Easy Returns – Buy with confidence from a leader in customer service

    As an Amazon Associate, we earn from qualifying purchases.

  • How to Fix Frigidaire Refrigerator Error E4

    How to Fix Frigidaire Refrigerator Error E4

    Error Code: E4 Difficulty: Hard

    Problem: Freezer thermistor (temperature sensor) is shorted.

    How to Fix E4 Error (Step-by-Step)

    1. Unplug the refrigerator from the wall and empty the freezer compartment completely.
    2. Remove all shelves, the ice maker, and the interior rear panel of the freezer to expose the evaporator assembly.
    3. If the coils are encased in ice, use a hairdryer on a low setting to carefully melt the ice and get a clear view.
    4. Locate the defrost heater. It is typically a glass tube or a metal-sheathed element at the bottom of the evaporator coils.
    5. Disconnect the two wire leads attached to the ends of the heater element. They usually pull off.
    6. Unclip the old heater from the evaporator coils and carefully remove it.
    7. Install the new heater by clipping it into the same position, then reconnect the wire leads securely.
    8. Reassemble the freezer interior and plug the refrigerator back in.

    What to Check Next on This Frigidaire Refrigerator

    Focused repair path: refrigerator door, airflow, sensor, defrost, dispenser, and control checks. Do not treat this as a reset-only problem if the code keeps returning; use what the appliance does during the failed part of the cycle to choose the next check.

    1. Confirm the doors close fully, the gaskets seal, and the display is not reacting to a door left open or a blocked switch.
    2. Check for blocked vents, heavy frost, stalled fans, warm compartments, or recent power interruptions before replacing electronic parts.
    3. If the code involves temperature or airflow, inspect the evaporator fan, thermistor, defrost path, wiring, and control connections.
    4. If the symptom follows a door or dispenser event, check the switch, harness, hinge wiring, and connector seating first.
    5. Use the full Frigidaire refrigerator model number before buying parts because sensors, boards, fans, and switches are model-specific.

    Check, inspect, clean, test, measure, remove, reconnect, clear, and replace parts only when the symptom supports that path. If these checks point toward a part, verify the complete Frigidaire model number from the appliance tag before ordering. The same error wording can use different valves, sensors, pumps, motors, heaters, locks, switches, or control boards depending on the exact model.

    &tag=appliancefixg-20

    When It’s Better to Replace Than Repair

    Refrigerator repairs can become costly when sealed-system, control, defrost, fan, or ice-maker issues repeat.
    Confirm width, height, depth, door swing, counter-depth needs, water line, and delivery path before ordering.
    For repair parts, verify exact fit with the full refrigerator model number before buying; these links are general replacement-appliance shopping options.

    • [OK]Water inlet valve, ice maker, or fan failures keep returning
    • [OK]Defrost heater, thermostat, or sensor faults stack up
    • [OK]Compressor or sealed-system repair is not economical
    • [OK]Food-loss risk is becoming a pattern

    Recommended Refrigerator Replacement Options

    Top-Freezer Models

    Simple Full-Size Replacements

    • Usually lower cost and easy to service
    • Confirm hinge side and kitchen clearance
    • Measure width, depth, and height

    Shop Top-Freezer Refrigerators

    Side-by-Side

    Ice and Water Convenience

    • Good for narrow door swing spaces
    • Confirm water line and filter access
    • Check freezer width for large items

    Compare Side-by-Side Models

    French-Door

    Premium Kitchen Layout

    • Popular wide fresh-food access
    • Confirm drawer clearance and counter depth
    • Measure delivery path before ordering

    View French-Door Refrigerators

    As an Amazon Associate, we earn from qualifying purchases.

    Still Not Working?
    If the replacement part didn’t fix the issue, you may have a wiring problem or main board failure.


    Browse all Frigidaire error codes: Frigidaire Error Codes
  • How to Fix Kenmore Dishwasher Error F30

    How to Fix Kenmore Dishwasher Error F30

    Problem: Overcurrent condition detected

    How to Fix Dishwasher Error

    1. Check for short circuits in heating element, motor, or solenoids.
    2. Test current draw of all components during operation.
    3. Inspect control board for burned components or traces.
    4. Verify proper voltage supply to dishwasher.
    5. Check for mechanical binding causing motor overload.
    6. Replace control board if overcurren protection is Falsely triggering.

    What to Check Next on This Kenmore Dishwasher

    Kenmore Dishwasher Error F30: Use the code or symptom as the starting clue, then confirm what the dishwasher actually does before ordering parts.

    1. Turn power off before opening panels, reaching into the sump, or checking the valve, pump, heater, latch, sensor, or control wiring.
    2. Clean the filter and sump, check spray-arm movement, verify water supply, and inspect the drain hose and sink connection first.
    3. Confirm whether the fault appears during fill, wash, drain, heat/dry, latch, leak detection, or control-panel response.
    4. Run a short test cycle after cleaning and watch the exact stage where the symptom returns.
    5. Test the suspected part path only after basic checks, measure accessible electrical items when the service sheet allows it, and replace a part only after the complete Kenmore dishwasher model number confirms the right component.

    If the issue returns after these checks, match replacement parts to the complete Kenmore dishwasher model number from the appliance tag. Kenmore models can be built by different manufacturers, so fit depends on the full model number.

    As an Amazon Associate, we earn from qualifying purchases through links on this page.

    Recommended Parts to Check

    No exact official OEM part number is listed here because the correct Kenmore dishwasher part can vary by complete model number. These are targeted part-category searches, not universal fit claims.

    • Kenmore dishwasher drain pump
      Common replacement category: Drain pump
      Fit note: Exact OEM part number varies by complete Kenmore dishwasher model number. Confirm compatibility before buying.
      Confidence: Medium
      This category can be relevant for drain and standing-water symptoms after filter, sump, and hose checks.

      Search Amazon for Kenmore dishwasher drain pump

    • Kenmore dishwasher water inlet valve
      Common replacement category: Water inlet valve
      Fit note: Exact OEM part number varies by complete Kenmore dishwasher model number. Confirm compatibility before buying.
      Confidence: Medium
      This category can be relevant for fill faults after supply, float, and inlet screen checks.

      Search Amazon for Kenmore dishwasher water inlet valve

    • Kenmore dishwasher circulation pump
      Common replacement category: Circulation pump / wash motor
      Fit note: Exact OEM part number varies by complete Kenmore dishwasher model number. Confirm compatibility before buying.
      Confidence: Medium
      This category can be relevant for weak wash or spray-arm symptoms after filter and spray-arm checks.

      Search Amazon for Kenmore dishwasher circulation pump

    Before ordering: match the part to the complete Kenmore dishwasher model number on the appliance tag.


    Still Not Working?

    If the replacement part didn’t fix the issue, you may have a wiring problem or main board failure.

    Browse all Kenmore error codes: Kenmore Error Codes

    When It’s Better to Replace Than Repair

    Dishwasher repairs can add up quickly when the pump, control, heater, or leak-related parts fail.
    Confirm cabinet width, water line, drain routing, electrical connection, and panel style before ordering.
    For repair parts, verify exact fit with the full dishwasher model number before buying; these links are general replacement-appliance shopping options.

    • [OK]Drain pump or circulation pump failure
    • [OK]Leaking tub, door, or float-switch issues
    • [OK]Heater or control failures on an older unit
    • [OK]Repeated poor washing or drying performance

    Recommended Dishwasher Replacement Options

    Built-In Dishwashers

    Standard 24-Inch Models

    • Common under-counter replacement size
    • Check height, width, and toe-kick clearance
    • Match hardwire or cord connection requirements

    Shop Built-In Dishwashers

    Compact Options

    18-Inch and Small-Space Models

    • Useful for narrow cabinets
    • Confirm ADA or compact dimensions
    • Verify panel and handle clearance

    Compare Compact Dishwashers

    Portable and Countertop

    No Built-In Cabinet Cutout

    • Good for rentals or limited cabinets
    • Confirm faucet adapter compatibility
    • Measure counter or storage space

    View Portable Dishwashers

    As an Amazon Associate, we earn from qualifying purchases.

  • How to Fix Frigidaire Refrigerator Error E3

    How to Fix Frigidaire Refrigerator Error E3

    Error Code: E3 Difficulty: Hard

    Problem: Freezer thermistor (temperature sensor) is open.

    How to Fix E3 Error (Step-by-Step)

    1. Unplug the refrigerator from the wall outlet to cut all power.
    2. Empty the freezer of all food, shelves, and the ice maker assembly to access the rear interior panel.
    3. Unscrew and remove the rear panel inside the freezer. This will expose the silver evaporator coils, which may be covered in frost.
    4. Locate the defrost bi-metal thermostat. It is a small, round component clipped directly onto the copper tubing of the evaporator coils.
    5. Disconnect the wires leading to the old thermostat. You may need to cut them and strip the ends if there is no plug.
    6. Using wire connectors, attach the new thermostat’s wires to the wires in the freezer. Ensure the connections are secure and waterproof.
    7. Firmly clip the new thermostat onto the evaporator tube, re-install the rear panel, and restore power.
    8. Turn the appliance off, wait about 2 minutes, then turn it back on.

    What to Check Next on This Frigidaire Refrigerator

    Focused repair path: refrigerator door, airflow, sensor, defrost, dispenser, and control checks. Do not treat this as a reset-only problem if the code keeps returning; use what the appliance does during the failed part of the cycle to choose the next check.

    1. Confirm the doors close fully, the gaskets seal, and the display is not reacting to a door left open or a blocked switch.
    2. Check for blocked vents, heavy frost, stalled fans, warm compartments, or recent power interruptions before replacing electronic parts.
    3. If the code involves temperature or airflow, inspect the evaporator fan, thermistor, defrost path, wiring, and control connections.
    4. If the symptom follows a door or dispenser event, check the switch, harness, hinge wiring, and connector seating first.
    5. Use the full Frigidaire refrigerator model number before buying parts because sensors, boards, fans, and switches are model-specific.

    Check, inspect, clean, test, measure, remove, reconnect, clear, and replace parts only when the symptom supports that path. If these checks point toward a part, verify the complete Frigidaire model number from the appliance tag before ordering. The same error wording can use different valves, sensors, pumps, motors, heaters, locks, switches, or control boards depending on the exact model.

    &tag=appliancefixg-20

    Verified Compatible Alternatives:

    • Defrost Bi-metal Thermostat

    When It’s Better to Replace Than Repair

    Refrigerator repairs can become costly when sealed-system, control, defrost, fan, or ice-maker issues repeat.
    Confirm width, height, depth, door swing, counter-depth needs, water line, and delivery path before ordering.
    For repair parts, verify exact fit with the full refrigerator model number before buying; these links are general replacement-appliance shopping options.

    • [OK]Water inlet valve, ice maker, or fan failures keep returning
    • [OK]Defrost heater, thermostat, or sensor faults stack up
    • [OK]Compressor or sealed-system repair is not economical
    • [OK]Food-loss risk is becoming a pattern

    Recommended Refrigerator Replacement Options

    Top-Freezer Models

    Simple Full-Size Replacements

    • Usually lower cost and easy to service
    • Confirm hinge side and kitchen clearance
    • Measure width, depth, and height

    Shop Top-Freezer Refrigerators

    Side-by-Side

    Ice and Water Convenience

    • Good for narrow door swing spaces
    • Confirm water line and filter access
    • Check freezer width for large items

    Compare Side-by-Side Models

    French-Door

    Premium Kitchen Layout

    • Popular wide fresh-food access
    • Confirm drawer clearance and counter depth
    • Measure delivery path before ordering

    View French-Door Refrigerators

    As an Amazon Associate, we earn from qualifying purchases.

    Still Not Working?
    If the replacement part didn’t fix the issue, you may have a wiring problem or main board failure.


    Browse all Frigidaire error codes: Frigidaire Error Codes
  • How to Fix Kenmore Dryer Error F09

    How to Fix Kenmore Dryer Error F09

    Problem: Door switch relay failure on control board

    How to Fix Dryer Error

    1. Turn off power supply.
    2. Remove control panel access cover.
    3. Inspect main control board for damaged door switch relay.
    4. Test door switch operation with multimeter (should change state when door opens/closes).
    5. Check wiring harness between door switch and control board.
    6. If relay is faulty, document all wire connections.
    7. Remove mounting screws and disconnect all connectors.
    8. Install new main control board assembly.
    9. Reconnect all harnesses and test door switch function.
    10. Verify proper cycle start/stop operation with door tests.

    What to Check Next on This Kenmore Dryer

    Kenmore Dryer Error F09: Use the code or symptom as the starting clue, then confirm what the dryer actually does before ordering parts.

    1. Unplug the dryer before checking the heater, thermal fuse, thermostat, motor, belt, door switch, sensors, or control wiring.
    2. Clean the lint screen and confirm strong airflow through the full vent path before replacing heat or control parts.
    3. Check the door switch, drum movement, belt, rollers, moisture sensor bars, loose connectors, and signs of overheating.
    4. Run a timed-dry test after airflow corrections and note whether the failure is no start, no heat, weak airflow, long dry time, or control behavior.
    5. Replace a part only after the same symptom repeats and the complete Kenmore dryer model number confirms compatibility.

    If the issue returns after these checks, match replacement parts to the complete Kenmore dryer model number from the appliance tag. Kenmore models can be built by different manufacturers, so fit depends on the full model number.

    As an Amazon Associate, we earn from qualifying purchases through links on this page.

    When It’s Better to Replace Than Repair

    Dryer repairs are often worth it for small parts, but repeated heating, motor, drum, or control failures can point toward replacement.
    Confirm gas vs electric, venting, voltage, doorway clearance, and laundry-space dimensions before ordering.
    For repair parts, verify exact fit with the full dryer model number before buying; these links are general replacement-appliance shopping options.

    • [OK]Thermal fuse or heater failures keep returning
    • [OK]Belt, roller, or motor repairs exceed unit value
    • [OK]Door switch or control issues stack with other faults
    • [OK]Older dryer has long dry times even after vent cleaning

    Recommended Dryer Replacement Options

    Electric Dryers

    240V Vented Models

    • Most common electric replacement type
    • Confirm 3-prong vs 4-prong cord needs
    • Verify vent path and laundry-space depth

    Shop Electric Dryers

    Gas Dryers

    Natural Gas Dryer Options

    • Confirm gas supply and shutoff location
    • Use qualified installation when required
    • Do not substitute electric for gas without planning

    Compare Gas Dryers

    Compact and Ventless

    Small-Space Dryer Choices

    • Good for apartments and tight closets
    • Confirm ventless condensation requirements
    • Check capacity before replacing full-size units

    View Compact Dryers

    As an Amazon Associate, we earn from qualifying purchases.

    Still Not Working?

    If the replacement part didn’t fix the issue, you may have a wiring problem or main board failure.


    Browse all Kenmore error codes: Kenmore Error Codes

  • How to Fix Frigidaire Refrigerator Error E2

    How to Fix Frigidaire Refrigerator Error E2

    Error Code: E2 Difficulty: Moderate

    Problem: Refrigerator thermistor (temperature sensor) is shorted.

    How to Fix E2 Error (Step-by-Step)

    1. Disconnect the refrigerator from its power source and confirm the error stays cleared during a full test cycle.
    2. Empty the freezer compartment completely, removing all shelves and bins to access the interior back panel.
    3. Remove the screws that hold the interior back panel in place. You may need to gently pry it loose if it is frozen.
    4. Locate the freezer temperature sensor. It is a small plastic probe with a wire, often clipped to the evaporator coils or mounted on the side wall.
    5. Unplug the wire connector for the old sensor and unclip it from its mounting location.
    6. Clip the new freezer sensor into the same position and securely connect its wire harness.
    7. Reinstall the interior panel, shelves, and bins, then plug the refrigerator back in.
    8. Turn the appliance off, wait about 2 minutes, then turn it back on.

    What to Check Next on This Frigidaire Refrigerator

    Focused repair path: refrigerator door, airflow, sensor, defrost, dispenser, and control checks. Do not treat this as a reset-only problem if the code keeps returning; use what the appliance does during the failed part of the cycle to choose the next check.

    1. Confirm the doors close fully, the gaskets seal, and the display is not reacting to a door left open or a blocked switch.
    2. Check for blocked vents, heavy frost, stalled fans, warm compartments, or recent power interruptions before replacing electronic parts.
    3. If the code involves temperature or airflow, inspect the evaporator fan, thermistor, defrost path, wiring, and control connections.
    4. If the symptom follows a door or dispenser event, check the switch, harness, hinge wiring, and connector seating first.
    5. Use the full Frigidaire refrigerator model number before buying parts because sensors, boards, fans, and switches are model-specific.

    Check, inspect, clean, test, measure, remove, reconnect, clear, and replace parts only when the symptom supports that path. If these checks point toward a part, verify the complete Frigidaire model number from the appliance tag before ordering. The same error wording can use different valves, sensors, pumps, motors, heaters, locks, switches, or control boards depending on the exact model.

    &tag=appliancefixg-20

    Verified Compatible Alternatives:

    • Freezer Temperature Sensor

    When It’s Better to Replace Than Repair

    Refrigerator repairs can become costly when sealed-system, control, defrost, fan, or ice-maker issues repeat.
    Confirm width, height, depth, door swing, counter-depth needs, water line, and delivery path before ordering.
    For repair parts, verify exact fit with the full refrigerator model number before buying; these links are general replacement-appliance shopping options.

    • [OK]Water inlet valve, ice maker, or fan failures keep returning
    • [OK]Defrost heater, thermostat, or sensor faults stack up
    • [OK]Compressor or sealed-system repair is not economical
    • [OK]Food-loss risk is becoming a pattern

    Recommended Refrigerator Replacement Options

    Top-Freezer Models

    Simple Full-Size Replacements

    • Usually lower cost and easy to service
    • Confirm hinge side and kitchen clearance
    • Measure width, depth, and height

    Shop Top-Freezer Refrigerators

    Side-by-Side

    Ice and Water Convenience

    • Good for narrow door swing spaces
    • Confirm water line and filter access
    • Check freezer width for large items

    Compare Side-by-Side Models

    French-Door

    Premium Kitchen Layout

    • Popular wide fresh-food access
    • Confirm drawer clearance and counter depth
    • Measure delivery path before ordering

    View French-Door Refrigerators

    As an Amazon Associate, we earn from qualifying purchases.

    Still Not Working?
    If the replacement part didn’t fix the issue, you may have a wiring problem or main board failure.


    Browse all Frigidaire error codes: Frigidaire Error Codes
  • How to Fix Maytag Dishwasher Error Flash-10-1

    How to Fix Maytag Dishwasher Error Flash-10-1

    Problem: Detergent dispenser system malfunction – dispenser solenoid failure

    How to Fix Dishwasher Error

    1. Turn off power at the circuit breaker.
    2. Open the dishwasher door and remove the detergent dispenser cover.
    3. Remove screws securing the dispenser assembly to the inner door.
    4. Disconnect the electrical connector from the dispenser solenoid.
    5. Test the solenoid resistance with a multimeter (500-1500 ohms).
    6. Inspect the dispenser mechanism for debris or mechanical binding.
    7. Clean the dispenser housing and moving parts with vinegar solution.
    8. If the solenoid is faulty, replae the entire dispenser assembly.
    9. Reconnect the electrical connector.
    10. Test dispenser operation in diagnostic mode.

    As an Amazon Associate, we earn from qualifying purchases through links on this page.

    Still Not Working?

    If the replacement part didn’t fix the issue, you may have a wiring problem or main board failure.

    Browse all Maytag error codes: Maytag Error Codes

    When It’s Better to Replace Than Repair

    Sometimes replacing an appliance makes more financial sense than putting more money into repairs.
    Here are a few signs it may be time to shop for a new one:

    • Appliance over 8-10 years old
    • Repair cost over 50% of replacement
    • Multiple recent breakdowns
    • Major component failure

    Recommended Replacement Options

    Budget Option

    Top Rated Washers Under $600

    • Amazon’s Highest-Rated Value Models
    • Free ‘Room of Choice’ Delivery Available
    • Professional Haul-away Options at Checkout


    View Top Rated Models & Delivery Options

    Mid-Range Option

    Top Rated Washers $600 to $1,000

    • Best-Sellers with Thousands of 5-Star Reviews
    • Expert Installation & Hookup Services available
    • Protection Plans for Long-Term Peace of Mind


    View Top Rated Models & Delivery Options

    Premium Option

    Top Rated Washers Over $1,000

    • Top-of-the-Line Performance & Technology
    • White-Glove Delivery and Haul-away eligible
    • Comprehensive Warranty & Support Options


    View Top Rated Models & Delivery Options

    Why Upgrade via Amazon?

    • Fast, Scheduled Delivery – You pick the date and time
    • Expert Installation – Professional setup available for most models
    • Old Appliance Haul-away – They’ll take your broken unit when they leave
    • Easy Returns – Buy with confidence from a leader in customer service

    As an Amazon Associate, we earn from qualifying purchases.

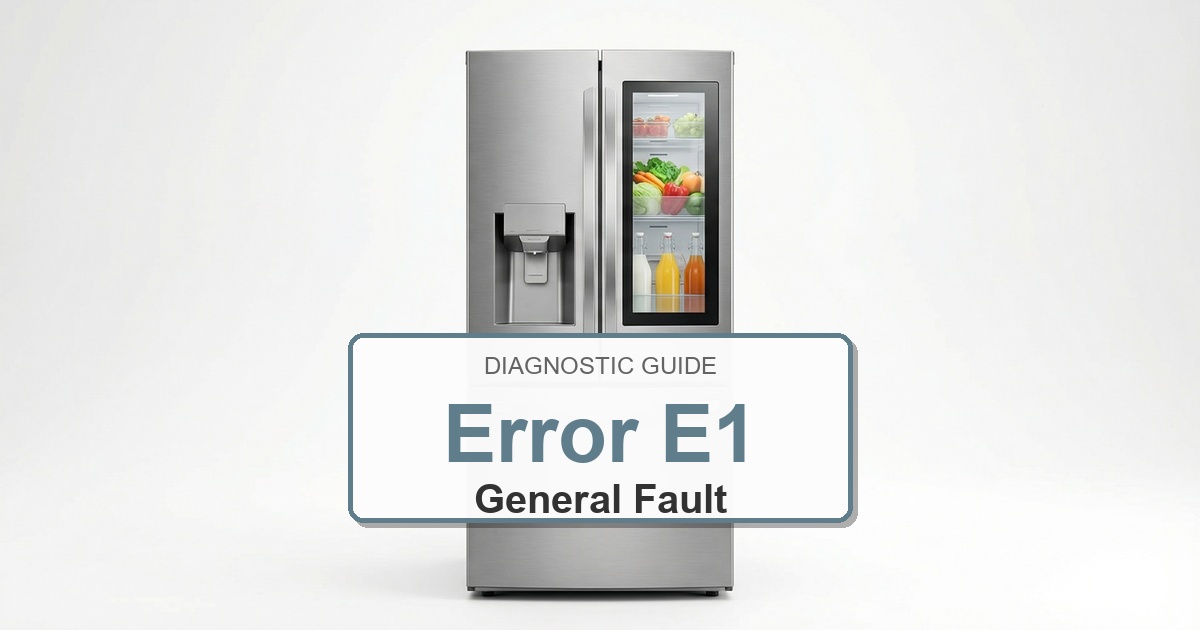
  • How to Fix Frigidaire Refrigerator Error E1

    How to Fix Frigidaire Refrigerator Error E1

    Error Code: E1 Difficulty: Moderate

    Problem: Refrigerator thermistor (temperature sensor) is open.

    How to Fix E1 Error (Step-by-Step)

    1. Unplug the refrigerator from the power outlet for safety and confirm the error stays cleared during a full test cycle.
    2. Empty the fresh food section to get clear access to the interior walls and ceiling.
    3. Locate the thermistor cover. It’s a small, vented plastic housing, usually on the upper right side wall or near the control housing at the top.
    4. Use a small flathead screwdriver to gently pry the cover off, exposing the sensor probe.
    5. Disconnect the wire harness attached to the old thermistor. It will have a small clip you need to press.
    6. Connect the new thermistor to the wire harness until it clicks into place.
    7. Snap the plastic cover back on, return food to the refrigerator, and plug the unit back in.
    8. Turn the appliance off, wait about 2 minutes, then turn it back on.

    What to Check Next on This Frigidaire Refrigerator

    Focused repair path: refrigerator door, airflow, sensor, defrost, dispenser, and control checks. Do not treat this as a reset-only problem if the code keeps returning; use what the appliance does during the failed part of the cycle to choose the next check.

    1. Confirm the doors close fully, the gaskets seal, and the display is not reacting to a door left open or a blocked switch.
    2. Check for blocked vents, heavy frost, stalled fans, warm compartments, or recent power interruptions before replacing electronic parts.
    3. If the code involves temperature or airflow, inspect the evaporator fan, thermistor, defrost path, wiring, and control connections.
    4. If the symptom follows a door or dispenser event, check the switch, harness, hinge wiring, and connector seating first.
    5. Use the full Frigidaire refrigerator model number before buying parts because sensors, boards, fans, and switches are model-specific.

    Check, inspect, clean, test, measure, remove, reconnect, clear, and replace parts only when the symptom supports that path. If these checks point toward a part, verify the complete Frigidaire model number from the appliance tag before ordering. The same error wording can use different valves, sensors, pumps, motors, heaters, locks, switches, or control boards depending on the exact model.

    &tag=appliancefixg-20

    Verified Compatible Alternatives:

    • Refrigerator Temperature Sensor

    When It’s Better to Replace Than Repair

    Refrigerator repairs can become costly when sealed-system, control, defrost, fan, or ice-maker issues repeat.
    Confirm width, height, depth, door swing, counter-depth needs, water line, and delivery path before ordering.
    For repair parts, verify exact fit with the full refrigerator model number before buying; these links are general replacement-appliance shopping options.

    • [OK]Water inlet valve, ice maker, or fan failures keep returning
    • [OK]Defrost heater, thermostat, or sensor faults stack up
    • [OK]Compressor or sealed-system repair is not economical
    • [OK]Food-loss risk is becoming a pattern

    Recommended Refrigerator Replacement Options

    Top-Freezer Models

    Simple Full-Size Replacements

    • Usually lower cost and easy to service
    • Confirm hinge side and kitchen clearance
    • Measure width, depth, and height

    Shop Top-Freezer Refrigerators

    Side-by-Side

    Ice and Water Convenience

    • Good for narrow door swing spaces
    • Confirm water line and filter access
    • Check freezer width for large items

    Compare Side-by-Side Models

    French-Door

    Premium Kitchen Layout

    • Popular wide fresh-food access
    • Confirm drawer clearance and counter depth
    • Measure delivery path before ordering

    View French-Door Refrigerators

    As an Amazon Associate, we earn from qualifying purchases.

    Still Not Working?
    If the replacement part didn’t fix the issue, you may have a wiring problem or main board failure.


    Browse all Frigidaire error codes: Frigidaire Error Codes
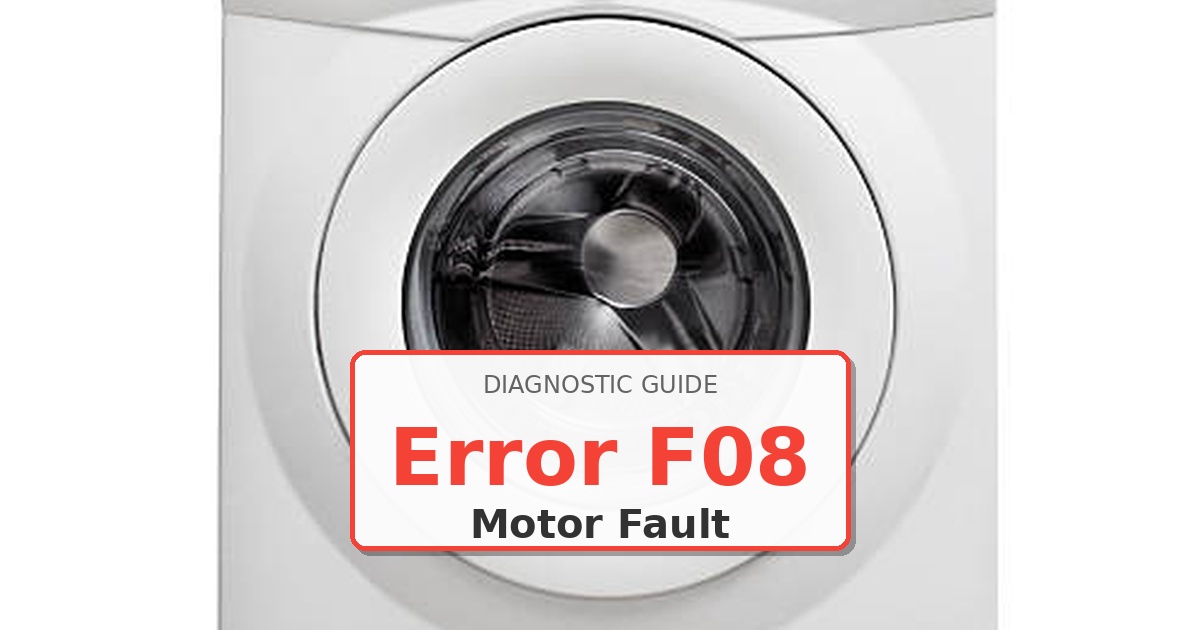
  • How to Fix Kenmore Dryer Error F08

    How to Fix Kenmore Dryer Error F08

    Problem: Motor relay failure on control board

    How to Fix Dryer Error

    1. Disconnect power at circuit breaker.
    2. Remove control panel access cover.
    3. Inspect main control board for burnt motor relay contacts.
    4. Test motor relay operation with multimeter during drum rotation.
    5. Check voltage supply to motor circuit.
    6. If relay is faulty, document all wire connections before removal.
    7. Remove mounting screws and disconnect all connectors.
    8. Install new main control board assembly.
    9. Reconnect all harnesses and test motor operation.
    10. Run complete cycle to verify proper motor control.

    What to Check Next on This Kenmore Dryer

    Kenmore Dryer Error F08: Use the code or symptom as the starting clue, then confirm what the dryer actually does before ordering parts.

    1. Unplug the dryer before checking the heater, thermal fuse, thermostat, motor, belt, door switch, sensors, or control wiring.
    2. Clean the lint screen and confirm strong airflow through the full vent path before replacing heat or control parts.
    3. Check the door switch, drum movement, belt, rollers, moisture sensor bars, loose connectors, and signs of overheating.
    4. Run a timed-dry test after airflow corrections and note whether the failure is no start, no heat, weak airflow, long dry time, or control behavior.
    5. Replace a part only after the same symptom repeats and the complete Kenmore dryer model number confirms compatibility.

    If the issue returns after these checks, match replacement parts to the complete Kenmore dryer model number from the appliance tag. Kenmore models can be built by different manufacturers, so fit depends on the full model number.

    As an Amazon Associate, we earn from qualifying purchases through links on this page.

    When It’s Better to Replace Than Repair

    Dryer repairs are often worth it for small parts, but repeated heating, motor, drum, or control failures can point toward replacement.
    Confirm gas vs electric, venting, voltage, doorway clearance, and laundry-space dimensions before ordering.
    For repair parts, verify exact fit with the full dryer model number before buying; these links are general replacement-appliance shopping options.

    • [OK]Thermal fuse or heater failures keep returning
    • [OK]Belt, roller, or motor repairs exceed unit value
    • [OK]Door switch or control issues stack with other faults
    • [OK]Older dryer has long dry times even after vent cleaning

    Recommended Dryer Replacement Options

    Electric Dryers

    240V Vented Models

    • Most common electric replacement type
    • Confirm 3-prong vs 4-prong cord needs
    • Verify vent path and laundry-space depth

    Shop Electric Dryers

    Gas Dryers

    Natural Gas Dryer Options

    • Confirm gas supply and shutoff location
    • Use qualified installation when required
    • Do not substitute electric for gas without planning

    Compare Gas Dryers

    Compact and Ventless

    Small-Space Dryer Choices

    • Good for apartments and tight closets
    • Confirm ventless condensation requirements
    • Check capacity before replacing full-size units

    View Compact Dryers

    As an Amazon Associate, we earn from qualifying purchases.

    Still Not Working?

    If the replacement part didn’t fix the issue, you may have a wiring problem or main board failure.


    Browse all Kenmore error codes: Kenmore Error Codes

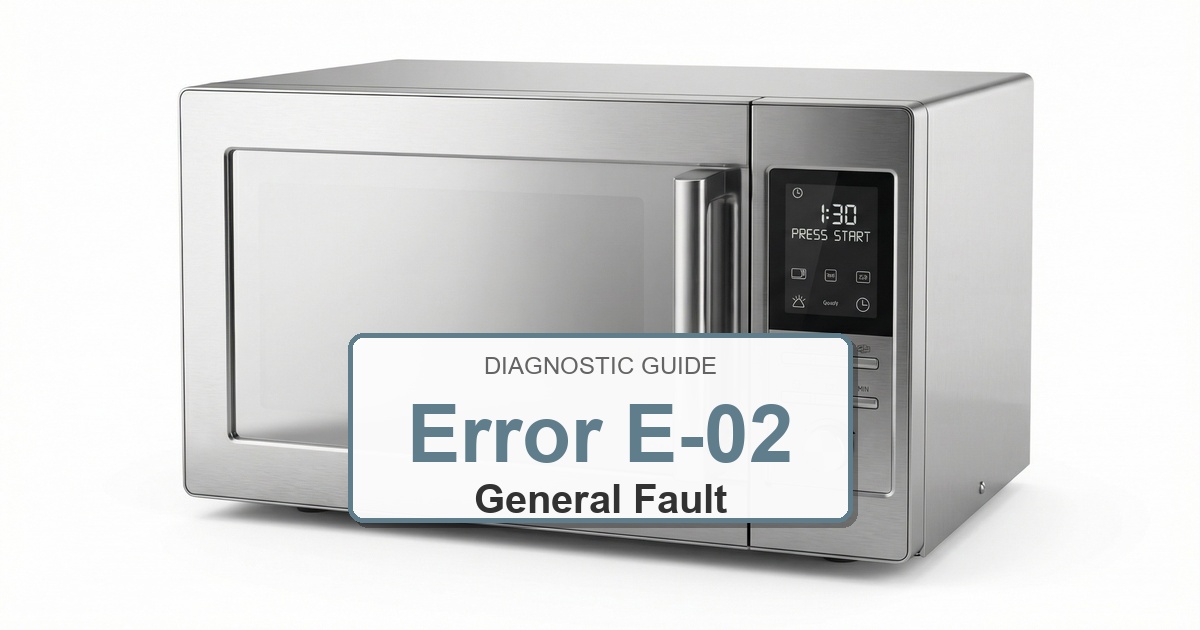
  • How to Fix LG Microwave Error E-02

    How to Fix LG Microwave Error E-02

    Error Code: E-02 Difficulty: Hard

    Problem: The temperature in convection mode is not rising as it should.

    How to Fix E-02 Error (Step-by-Step)

    1. Disconnect the microwave from the power source completely and confirm the error stays cleared during a full test cycle.
    2. Remove the outer casing of the microwave to get to the internal parts.
    3. Find the convection heater element, which is usually a circular element located at the back or top of the oven cavity, often behind a metal panel.
    4. Visually inspect the heater element for any visible breaks, burns, or damage.
    5. Use a multimeter to test the heater for continuity. If the multimeter shows no continuity, the heater element is broken and must be replaced.
    6. If the heater tests good, the problem may be the main control board not sending power to the heater.
    7. Replacing the main control board is a complex task; if you’ve determined it’s the cause, carefully label and disconnect all wires from the old board before installing the new one.
    8. Turn the appliance off, wait about 2 minutes, then turn it back on.

    Next Steps and Parts

    Recommended Parts to Check

    Compatibility note: Exact LG microwave part numbers vary by complete model number, production revision, and internal layout. Treat these as diagnostic part-category searches, then confirm fit with the full model number before ordering.
    • Start here
      LG microwave humidity sensor
      Common replacement category: Humidity or steam sensor
      Symptom match: Most likely when: error E-02 appears during sensor cooking, reheating, or shortly after steam builds.
      Check first: Check first: food splatter, blocked sensor airflow, and loose sensor connectors.

      Find compatible LG microwave humidity sensor

    • Also check
      LG microwave temperature sensor
      Common replacement category: Temperature sensor
      Symptom match: Most likely when: error E-02 follows heating or cooling changes.
      Check first: Check first: sensor resistance and harness continuity against the model service data.

      Find compatible LG microwave temperature sensor

    • Harness path
      LG microwave wire harness
      Common replacement category: Sensor harness
      Symptom match: Most likely when: error E-02 is intermittent or changes when the cabinet is moved.
      Check first: Check first: pinched wires, loose plugs, and corrosion before ordering parts.

      Find compatible LG microwave wire harness

    • Control path
      LG microwave control board
      Common replacement category: Electronic control board
      Symptom match: Most likely when: sensor and harness tests pass but error E-02 returns.
      Check first: Check first: board connectors and visible damage.

      Find compatible LG microwave control board

    Model-number note: Use the LG microwave model tag before buying; these links are not universal fit claims.

    LG Microwave Error E-02 Checks Before Replacing Parts

    1. Disconnect power before opening the cabinet, and do not touch high-voltage parts unless you are trained to discharge and test them safely.
    2. Confirm the full LG model number from the tag before matching any replacement category to the appliance.
    3. Check the simple symptom path first: door closure, keypad response, airflow, and any obvious loose or damaged connectors.
    4. Test switches, sensors, or harnesses with a meter where the service data supports it instead of ordering parts by code alone.
    5. If the related parts test correctly, inspect the control area and harness before considering a model-matched control board.

    When It’s Better to Replace Than Repair

    Microwave repairs require extra caution because high-voltage parts can retain a dangerous charge after unplugging.
    Door switches, turntable motors, fuses, and controls may be replaceable, but many microwave failures are safer and cheaper to solve with replacement.
    For repair parts or built-in trim kits, verify exact fit with the full microwave model number before buying; these links are general replacement-appliance shopping options.

    • [OK]Door switch or latch problems return after adjustment
    • [OK]Turntable motor, fuse, or control repairs approach replacement cost
    • [OK]High-voltage diode, capacitor, or magnetron is suspected
    • [OK]Over-the-range fit, venting, or keypad issues keep recurring

    Recommended Microwave Replacement Options

    Countertop Microwaves

    Simple Plug-In Replacements

    • Fastest replacement path
    • Measure counter depth and door swing
    • Match wattage and capacity needs

    Shop Countertop Microwaves

    Over-the-Range

    Microwave and Vent Hood Units

    • Confirm width, mounting bracket, and cabinet height
    • Match recirculating or exterior venting
    • Plan for two-person installation

    Compare Over-the-Range Units

    Built-In Trim Kits

    Cabinet-Fit Microwave Options

    • Confirm trim-kit compatibility by model
    • Measure cabinet cutout before ordering
    • Do not assume old trim fits a new unit

    View Built-In Options

    Safety note: Do not service microwave high-voltage components unless you are trained and equipped to discharge and test them safely.

    As an Amazon Associate, we earn from qualifying purchases.

    Still Not Working?
    If the replacement part didn’t fix the issue, you may have a wiring problem or main board failure.