Category: Dryer

  • How to Fix Electrolux Dryer Error E71 / E72

    How to Fix Electrolux Dryer Error E71 / E72

    Error Code: E71 / E72 Difficulty: Moderate

    Problem: Outlet thermistor failure.

    How to Fix E71 / E72 Error (Step-by-Step)

    1. Disconnect the dryer from the wall outlet to ensure safety.
    2. Slide the dryer away from the wall and remove the screws holding the rear access panel in place.
    3. Locate the outlet thermistor, which is a small sensor mounted on the exhaust housing.
    4. Unplug the wire harness connected to the old thermistor and confirm the error stays cleared during a full test cycle.
    5. Remove the single screw holding the thermistor and take it off.
    6. Install the new thermistor, secure it with the screw, and plug the wire harness back in.
    7. Reattach the rear panel, plug the dryer in, and run a test cycle to check if the error is gone.
    8. Turn the appliance off, wait about 2 minutes, then turn it back on.

    Verified Compatible Alternatives:

    • 134711200
    • 134711300

    Still Not Working?
    If the replacement part didn’t fix the issue, you may have a wiring problem or main board failure.


    Browse all Electrolux error codes: Electrolux Error Codes
  • How to Fix Electrolux Dryer Error H2 / B2

    How to Fix Electrolux Dryer Error H2 / B2

    Error Code: H2 / B2 Difficulty: Hard

    Problem: Power Supply Issue.

    How to Fix H2 / B2 Error (Step-by-Step)

    1. UNPLUG THE DRYER. Before starting any repair, disconnect the dryer from the wall outlet to prevent electrical shock.
    2. Access the main control board by removing the screws holding the top panel of the dryer in place, then lift the panel off.
    3. Before disconnecting any wires, take a clear picture of the control board and all its connections with your smartphone. This will be your guide for reassembly.
    4. Carefully disconnect all wire harnesses attached to the old control board. Most have small plastic clips that need to be pressed to release the connector.
    5. Remove the screws or release the plastic tabs holding the old control board in its housing and gently lift it out.
    6. Place the new control board into the housing, ensuring it is properly seated, and secure it with the original screws or clips.
    7. Using the photo you took earlier, reconnect all the wire harnesses to their correct terminals on the new board. Ensure each connector clicks securely into place.
    8. Reinstall the top panel, plug the dryer back in, and run a test cycle to ensure the error is cleared and the dryer functions correctly.

    What to Check Next on This Electrolux Dryer

    Focused repair path: dryer airflow, heating, motor, sensor, and control checks. Do not treat the fault as reset-only if it keeps returning; use the failed function to choose the next test.

    1. Disconnect power before opening panels, then confirm whether the Electrolux dryer repeats the same code after a clean reset.
    2. Match the symptom to the part of the cycle or function that fails: fill, drain, heat, cool, spin, latch, ignite, fan, sensor, or control response.
    3. Inspect simple causes first: airflow, water supply, drain path, door closure, filter, venting, wiring connectors, and visible damage.
    4. Use meter testing or service diagnostics before replacing electronic controls, because wiring, switches, sensors, and loads can mimic board failure.
    5. Use the complete Electrolux dryer model number from the appliance tag before ordering any model-specific part.

    Check, inspect, clean, test, measure, remove, reconnect, clear, and replace parts only when the symptom supports that path. If these checks point toward a part, verify the complete Electrolux model number from the appliance tag before ordering.

    Parts Availability Note: For this Electrolux/Frigidaire error code, exact OEM part numbers can vary by model revision and serial range. We’ve listed the most likely component(s), but confirm compatibility using your full model number before ordering. If no exact SKU is shown, use this guide for diagnosis first, then verify the matching OEM part on RepairClinic or PartSelect.

    Recommended Parts to Check

    No exact official OEM part number is listed here because the correct Electrolux dryer part can vary by complete model number. These are targeted part-category searches, not universal fit claims.

    • Electrolux dryer thermal fuse
      Common replacement category: Thermal fuse
      Fit note: Exact OEM part number varies by complete Electrolux dryer model number. Confirm compatibility before buying.
      Why this category can matter: no-heat or no-start symptoms after venting and power checks.

      Search Amazon for Electrolux dryer thermal fuse

    • Electrolux dryer heating element
      Common replacement category: Heating element
      Fit note: Exact OEM part number varies by complete Electrolux dryer model number. Confirm compatibility before buying.
      Why this category can matter: electric dryer no-heat symptoms after airflow checks.

      Search Amazon for Electrolux dryer heating element

    • Electrolux dryer door switch
      Common replacement category: Door switch
      Fit note: Exact OEM part number varies by complete Electrolux dryer model number. Confirm compatibility before buying.
      Why this category can matter: start or cycle-interrupt symptoms tied to door movement.

      Search Amazon for Electrolux dryer door switch

    Before ordering: match the part to the complete Electrolux dryer model number on the appliance tag.

    When It’s Better to Replace Than Repair

    Dryer repairs are often worth it for small parts, but repeated heating, motor, drum, or control failures can point toward replacement.
    Confirm gas vs electric, venting, voltage, doorway clearance, and laundry-space dimensions before ordering.
    For repair parts, verify exact fit with the full dryer model number before buying; these links are general replacement-appliance shopping options.

    • [OK]Thermal fuse or heater failures keep returning
    • [OK]Belt, roller, or motor repairs exceed unit value
    • [OK]Door switch or control issues stack with other faults
    • [OK]Older dryer has long dry times even after vent cleaning

    Recommended Dryer Replacement Options

    Electric Dryers

    240V Vented Models

    • Most common electric replacement type
    • Confirm 3-prong vs 4-prong cord needs
    • Verify vent path and laundry-space depth

    Shop Electric Dryers

    Gas Dryers

    Natural Gas Dryer Options

    • Confirm gas supply and shutoff location
    • Use qualified installation when required
    • Do not substitute electric for gas without planning

    Compare Gas Dryers

    Compact and Ventless

    Small-Space Dryer Choices

    • Good for apartments and tight closets
    • Confirm ventless condensation requirements
    • Check capacity before replacing full-size units

    View Compact Dryers

    As an Amazon Associate, we earn from qualifying purchases.

    Still Not Working?
    If the replacement part didn’t fix the issue, you may have a wiring problem or main board failure.


    Browse all Electrolux error codes: Electrolux Error Codes
  • How to Fix Electrolux Dryer Error H4 / B4

    How to Fix Electrolux Dryer Error H4 / B4

    Error Code: H4 / B4 Difficulty: Hard

    Problem: Incorrect wiring.

    How to Fix H4 / B4 Error (Step-by-Step)

    1. Unplug the dryer from the wall outlet to ensure your safety by completely disconnecting the power.
    2. Remove the top panel of the dryer by unscrewing the screws holding it in place at the back or sides, then slide it off to access the internal components.
    3. Locate the Main Control Board, typically a larger circuit board with many wire connections, and the User Interface Board, which is situated directly behind the control knob and display panel.
    4. Carefully examine the bundle of wires (the wiring harness) that connects the two boards. Look for any signs of damage, such as pinched wires, burn marks, or loose-fitting plastic connectors at either end.
    5. Systematically unplug and then firmly reconnect each wire connector on both the Main Control Board and the User Interface Board. A secure connection is often confirmed by a clicking sound.
    6. If inspecting and reseating the wires does not resolve the error, one of the boards is likely faulty and needs to be replaced. This is an advanced repair, and caution is advised.
    7. Turn the appliance off, wait about 2 minutes, then turn it back on.

    What to Check Next on This Electrolux Dryer

    Focused repair path: dryer airflow, heating, motor, sensor, and control checks. Do not treat the fault as reset-only if it keeps returning; use the failed function to choose the next test.

    1. Disconnect power before opening panels, then confirm whether the Electrolux dryer repeats the same code after a clean reset.
    2. Match the symptom to the part of the cycle or function that fails: fill, drain, heat, cool, spin, latch, ignite, fan, sensor, or control response.
    3. Inspect simple causes first: airflow, water supply, drain path, door closure, filter, venting, wiring connectors, and visible damage.
    4. Use meter testing or service diagnostics before replacing electronic controls, because wiring, switches, sensors, and loads can mimic board failure.
    5. Use the complete Electrolux dryer model number from the appliance tag before ordering any model-specific part.

    Check, inspect, clean, test, measure, remove, reconnect, clear, and replace parts only when the symptom supports that path. If these checks point toward a part, verify the complete Electrolux model number from the appliance tag before ordering.

    Parts Availability Note: For this Electrolux/Frigidaire error code, exact OEM part numbers can vary by model revision and serial range. We’ve listed the most likely component(s), but confirm compatibility using your full model number before ordering. If no exact SKU is shown, use this guide for diagnosis first, then verify the matching OEM part on RepairClinic or PartSelect.

    Recommended Parts to Check

    No exact official OEM part number is listed here because the correct Electrolux dryer part can vary by complete model number. These are targeted part-category searches, not universal fit claims.

    • Electrolux dryer thermal fuse
      Common replacement category: Thermal fuse
      Fit note: Exact OEM part number varies by complete Electrolux dryer model number. Confirm compatibility before buying.
      Why this category can matter: no-heat or no-start symptoms after venting and power checks.

      Search Amazon for Electrolux dryer thermal fuse

    • Electrolux dryer heating element
      Common replacement category: Heating element
      Fit note: Exact OEM part number varies by complete Electrolux dryer model number. Confirm compatibility before buying.
      Why this category can matter: electric dryer no-heat symptoms after airflow checks.

      Search Amazon for Electrolux dryer heating element

    • Electrolux dryer door switch
      Common replacement category: Door switch
      Fit note: Exact OEM part number varies by complete Electrolux dryer model number. Confirm compatibility before buying.
      Why this category can matter: start or cycle-interrupt symptoms tied to door movement.

      Search Amazon for Electrolux dryer door switch

    Before ordering: match the part to the complete Electrolux dryer model number on the appliance tag.

    When It’s Better to Replace Than Repair

    Dryer repairs are often worth it for small parts, but repeated heating, motor, drum, or control failures can point toward replacement.
    Confirm gas vs electric, venting, voltage, doorway clearance, and laundry-space dimensions before ordering.
    For repair parts, verify exact fit with the full dryer model number before buying; these links are general replacement-appliance shopping options.

    • [OK]Thermal fuse or heater failures keep returning
    • [OK]Belt, roller, or motor repairs exceed unit value
    • [OK]Door switch or control issues stack with other faults
    • [OK]Older dryer has long dry times even after vent cleaning

    Recommended Dryer Replacement Options

    Electric Dryers

    240V Vented Models

    • Most common electric replacement type
    • Confirm 3-prong vs 4-prong cord needs
    • Verify vent path and laundry-space depth

    Shop Electric Dryers

    Gas Dryers

    Natural Gas Dryer Options

    • Confirm gas supply and shutoff location
    • Use qualified installation when required
    • Do not substitute electric for gas without planning

    Compare Gas Dryers

    Compact and Ventless

    Small-Space Dryer Choices

    • Good for apartments and tight closets
    • Confirm ventless condensation requirements
    • Check capacity before replacing full-size units

    View Compact Dryers

    As an Amazon Associate, we earn from qualifying purchases.

    Still Not Working?
    If the replacement part didn’t fix the issue, you may have a wiring problem or main board failure.


    Browse all Electrolux error codes: Electrolux Error Codes
  • How to Fix Electrolux Dryer Error HA/BD

    How to Fix Electrolux Dryer Error HA/BD

    Error Code: HA/BD Difficulty: Hard

    Problem: Line safe relay short circuit error.

    How to Fix HA/BD Error (Step-by-Step)

    1. UNPLUG THE DRYER. Safety is the top priority. Disconnect the dryer from the wall outlet completely before starting any work.
    2. Access the main control board. On most models, this involves removing several screws from the back of the top panel and sliding the panel off to expose the internal components.
    3. Photograph the wiring. Before disconnecting anything, take a clear picture of the control board and all the wire harnesses connected to it. This will be your guide for installation.
    4. Disconnect the old board. Carefully unplug all the wire connectors from the main control board. They have small locking tabs that you may need to press to release them. Once all wires are disconnected, remove the screws holding the board to its mounting bracket.
    5. Install the new control board. Mount the new board in the same position as the old one and secure it with the screws. Using your photograph as a reference, carefully and firmly reconnect each wire harness to the correct terminal on the new board.
    6. Reassemble the dryer. Slide the top panel back into place and secure it with the screws you removed earlier.
    7. Turn the appliance off, wait about 2 minutes, then turn it back on.

    What to Check Next on This Electrolux Dryer

    Focused repair path: dryer airflow, heating, motor, sensor, and control checks. Do not treat the fault as reset-only if it keeps returning; use the failed function to choose the next test.

    1. Disconnect power before opening panels, then confirm whether the Electrolux dryer repeats the same code after a clean reset.
    2. Match the symptom to the part of the cycle or function that fails: fill, drain, heat, cool, spin, latch, ignite, fan, sensor, or control response.
    3. Inspect simple causes first: airflow, water supply, drain path, door closure, filter, venting, wiring connectors, and visible damage.
    4. Use meter testing or service diagnostics before replacing electronic controls, because wiring, switches, sensors, and loads can mimic board failure.
    5. Use the complete Electrolux dryer model number from the appliance tag before ordering any model-specific part.

    Check, inspect, clean, test, measure, remove, reconnect, clear, and replace parts only when the symptom supports that path. If these checks point toward a part, verify the complete Electrolux model number from the appliance tag before ordering.

    Parts Availability Note: For this Electrolux/Frigidaire error code, exact OEM part numbers can vary by model revision and serial range. We’ve listed the most likely component(s), but confirm compatibility using your full model number before ordering. If no exact SKU is shown, use this guide for diagnosis first, then verify the matching OEM part on RepairClinic or PartSelect.

    Recommended Parts to Check

    No exact official OEM part number is listed here because the correct Electrolux dryer part can vary by complete model number. These are targeted part-category searches, not universal fit claims.

    • Electrolux dryer thermal fuse
      Common replacement category: Thermal fuse
      Fit note: Exact OEM part number varies by complete Electrolux dryer model number. Confirm compatibility before buying.
      Why this category can matter: no-heat or no-start symptoms after venting and power checks.

      Search Amazon for Electrolux dryer thermal fuse

    • Electrolux dryer heating element
      Common replacement category: Heating element
      Fit note: Exact OEM part number varies by complete Electrolux dryer model number. Confirm compatibility before buying.
      Why this category can matter: electric dryer no-heat symptoms after airflow checks.

      Search Amazon for Electrolux dryer heating element

    • Electrolux dryer door switch
      Common replacement category: Door switch
      Fit note: Exact OEM part number varies by complete Electrolux dryer model number. Confirm compatibility before buying.
      Why this category can matter: start or cycle-interrupt symptoms tied to door movement.

      Search Amazon for Electrolux dryer door switch

    Before ordering: match the part to the complete Electrolux dryer model number on the appliance tag.

    When It’s Better to Replace Than Repair

    Dryer repairs are often worth it for small parts, but repeated heating, motor, drum, or control failures can point toward replacement.
    Confirm gas vs electric, venting, voltage, doorway clearance, and laundry-space dimensions before ordering.
    For repair parts, verify exact fit with the full dryer model number before buying; these links are general replacement-appliance shopping options.

    • [OK]Thermal fuse or heater failures keep returning
    • [OK]Belt, roller, or motor repairs exceed unit value
    • [OK]Door switch or control issues stack with other faults
    • [OK]Older dryer has long dry times even after vent cleaning

    Recommended Dryer Replacement Options

    Electric Dryers

    240V Vented Models

    • Most common electric replacement type
    • Confirm 3-prong vs 4-prong cord needs
    • Verify vent path and laundry-space depth

    Shop Electric Dryers

    Gas Dryers

    Natural Gas Dryer Options

    • Confirm gas supply and shutoff location
    • Use qualified installation when required
    • Do not substitute electric for gas without planning

    Compare Gas Dryers

    Compact and Ventless

    Small-Space Dryer Choices

    • Good for apartments and tight closets
    • Confirm ventless condensation requirements
    • Check capacity before replacing full-size units

    View Compact Dryers

    As an Amazon Associate, we earn from qualifying purchases.

    Still Not Working?
    If the replacement part didn’t fix the issue, you may have a wiring problem or main board failure.


    Browse all Electrolux error codes: Electrolux Error Codes
  • How to Fix Electrolux Dryer Error HA–HF

    How to Fix Electrolux Dryer Error HA–HF

    Error Code: HA–HF Difficulty: Hard

    Problem: Line safety circuit errors.

    How to Fix HA–HF Error (Step-by-Step)

    1. Disconnect Power: Unplug the dryer from the wall outlet to ensure your safety. For gas dryers, also shut off the gas supply valve.
    2. Access the Control Board: Remove the screws securing the dryer’s top panel, which are usually located at the back. Slide the top panel off. The main control board is typically found at the front, inside a plastic housing.
    3. Photograph the Connections: Before touching any wires, take several clear pictures of the control board from various angles. These photos will be essential for correctly connecting the new board.
    4. Remove the Old Board: Carefully unplug each wire harness from the control board. Most connectors have a small locking tab that needs to be pressed to release it. Once all wires are disconnected, remove the screws holding the board in place and lift it out.
    5. Install the New Board: Position the new main control board in the housing and secure it with the screws you just removed.
    6. Reconnect Wires: Using the photos you took as a guide, plug each wire harness back into its correct port on the new board. Make sure every connection is secure and clicks into place.
    7. Turn the appliance off, wait about 2 minutes, then turn it back on.

    What to Check Next on This Electrolux Dryer

    Focused repair path: dryer airflow, heating, motor, sensor, and control checks. Do not treat the fault as reset-only if it keeps returning; use the failed function to choose the next test.

    1. Disconnect power before opening panels, then confirm whether the Electrolux dryer repeats the same code after a clean reset.
    2. Match the symptom to the part of the cycle or function that fails: fill, drain, heat, cool, spin, latch, ignite, fan, sensor, or control response.
    3. Inspect simple causes first: airflow, water supply, drain path, door closure, filter, venting, wiring connectors, and visible damage.
    4. Use meter testing or service diagnostics before replacing electronic controls, because wiring, switches, sensors, and loads can mimic board failure.
    5. Use the complete Electrolux dryer model number from the appliance tag before ordering any model-specific part.

    Check, inspect, clean, test, measure, remove, reconnect, clear, and replace parts only when the symptom supports that path. If these checks point toward a part, verify the complete Electrolux model number from the appliance tag before ordering.

    Parts Availability Note: For this Electrolux/Frigidaire error code, exact OEM part numbers can vary by model revision and serial range. We’ve listed the most likely component(s), but confirm compatibility using your full model number before ordering. If no exact SKU is shown, use this guide for diagnosis first, then verify the matching OEM part on RepairClinic or PartSelect.

    Recommended Parts to Check

    No exact official OEM part number is listed here because the correct Electrolux dryer part can vary by complete model number. These are targeted part-category searches, not universal fit claims.

    • Electrolux dryer thermal fuse
      Common replacement category: Thermal fuse
      Fit note: Exact OEM part number varies by complete Electrolux dryer model number. Confirm compatibility before buying.
      Why this category can matter: no-heat or no-start symptoms after venting and power checks.

      Search Amazon for Electrolux dryer thermal fuse

    • Electrolux dryer heating element
      Common replacement category: Heating element
      Fit note: Exact OEM part number varies by complete Electrolux dryer model number. Confirm compatibility before buying.
      Why this category can matter: electric dryer no-heat symptoms after airflow checks.

      Search Amazon for Electrolux dryer heating element

    • Electrolux dryer door switch
      Common replacement category: Door switch
      Fit note: Exact OEM part number varies by complete Electrolux dryer model number. Confirm compatibility before buying.
      Why this category can matter: start or cycle-interrupt symptoms tied to door movement.

      Search Amazon for Electrolux dryer door switch

    Before ordering: match the part to the complete Electrolux dryer model number on the appliance tag.

    When It’s Better to Replace Than Repair

    Dryer repairs are often worth it for small parts, but repeated heating, motor, drum, or control failures can point toward replacement.
    Confirm gas vs electric, venting, voltage, doorway clearance, and laundry-space dimensions before ordering.
    For repair parts, verify exact fit with the full dryer model number before buying; these links are general replacement-appliance shopping options.

    • [OK]Thermal fuse or heater failures keep returning
    • [OK]Belt, roller, or motor repairs exceed unit value
    • [OK]Door switch or control issues stack with other faults
    • [OK]Older dryer has long dry times even after vent cleaning

    Recommended Dryer Replacement Options

    Electric Dryers

    240V Vented Models

    • Most common electric replacement type
    • Confirm 3-prong vs 4-prong cord needs
    • Verify vent path and laundry-space depth

    Shop Electric Dryers

    Gas Dryers

    Natural Gas Dryer Options

    • Confirm gas supply and shutoff location
    • Use qualified installation when required
    • Do not substitute electric for gas without planning

    Compare Gas Dryers

    Compact and Ventless

    Small-Space Dryer Choices

    • Good for apartments and tight closets
    • Confirm ventless condensation requirements
    • Check capacity before replacing full-size units

    View Compact Dryers

    As an Amazon Associate, we earn from qualifying purchases.

    Still Not Working?
    If the replacement part didn’t fix the issue, you may have a wiring problem or main board failure.


    Browse all Electrolux error codes: Electrolux Error Codes
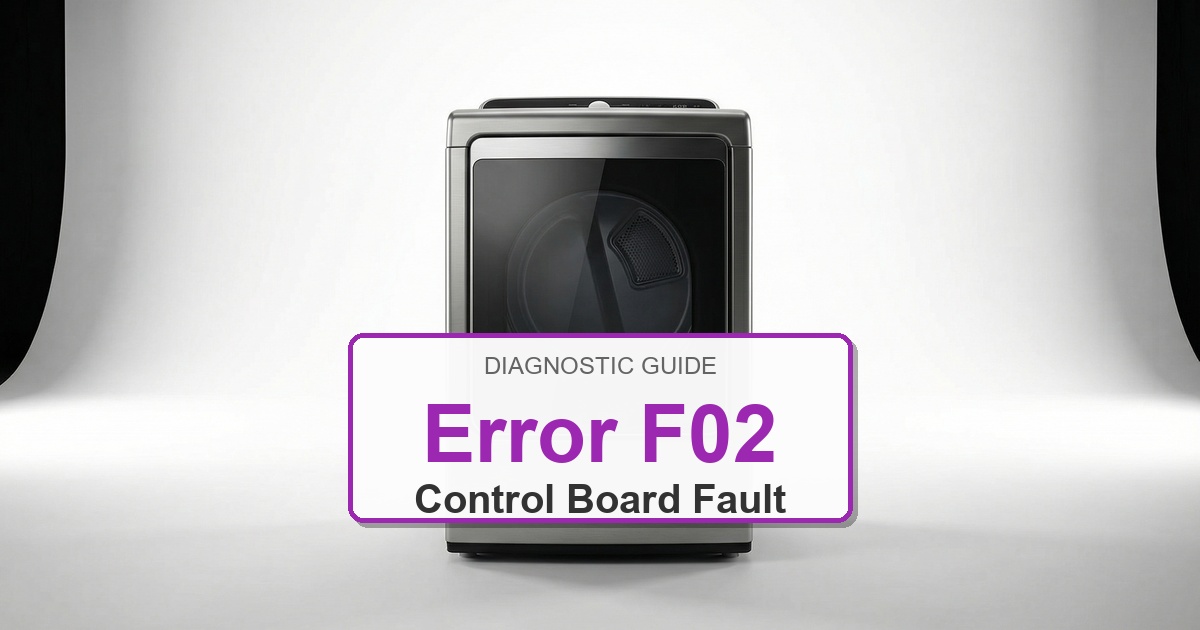
  • How to Fix Electrolux Dryer Error F02

    How to Fix Electrolux Dryer Error F02

    Error Code: F02 Difficulty: Moderate

    Problem: Control temperature sensor open or shorted.

    How to Fix F02 Error (Step-by-Step)

    1. Unplug the dryer from the wall outlet and confirm the error stays cleared during a full test cycle.
    2. Locate the temperature sensor, which is usually found on the blower housing or the heater box.
    3. Disconnect the wires leading to the sensor and confirm the error stays cleared during a full test cycle.
    4. Use a multimeter to test the resistance of the sensor. At room temperature, it should read around 50,000 ohms. An open circuit (infinite resistance) or a short circuit (zero resistance) means the sensor is bad.
    5. If the sensor is faulty, remove the screw holding it in place and install the new temperature sensor.
    6. Reconnect the wires to the new sensor and confirm the error stays cleared during a full test cycle.
    7. Reassemble the dryer, plug it in, and start a cycle to check if the error is resolved.
    8. Turn the appliance off, wait about 2 minutes, then turn it back on.

    What to Check Next on This Electrolux Dryer

    Focused repair path: dryer airflow, heating, motor, sensor, and control checks. Do not treat the fault as reset-only if it keeps returning; use the failed function to choose the next test.

    1. Disconnect power before opening panels, then confirm whether the Electrolux dryer repeats the same code after a clean reset.
    2. Match the symptom to the part of the cycle or function that fails: fill, drain, heat, cool, spin, latch, ignite, fan, sensor, or control response.
    3. Inspect simple causes first: airflow, water supply, drain path, door closure, filter, venting, wiring connectors, and visible damage.
    4. Use meter testing or service diagnostics before replacing electronic controls, because wiring, switches, sensors, and loads can mimic board failure.
    5. Use the complete Electrolux dryer model number from the appliance tag before ordering any model-specific part.

    Check, inspect, clean, test, measure, remove, reconnect, clear, and replace parts only when the symptom supports that path. If these checks point toward a part, verify the complete Electrolux model number from the appliance tag before ordering.

    When It’s Better to Replace Than Repair

    Dryer repairs are often worth it for small parts, but repeated heating, motor, drum, or control failures can point toward replacement.
    Confirm gas vs electric, venting, voltage, doorway clearance, and laundry-space dimensions before ordering.
    For repair parts, verify exact fit with the full dryer model number before buying; these links are general replacement-appliance shopping options.

    • [OK]Thermal fuse or heater failures keep returning
    • [OK]Belt, roller, or motor repairs exceed unit value
    • [OK]Door switch or control issues stack with other faults
    • [OK]Older dryer has long dry times even after vent cleaning

    Recommended Dryer Replacement Options

    Electric Dryers

    240V Vented Models

    • Most common electric replacement type
    • Confirm 3-prong vs 4-prong cord needs
    • Verify vent path and laundry-space depth

    Shop Electric Dryers

    Gas Dryers

    Natural Gas Dryer Options

    • Confirm gas supply and shutoff location
    • Use qualified installation when required
    • Do not substitute electric for gas without planning

    Compare Gas Dryers

    Compact and Ventless

    Small-Space Dryer Choices

    • Good for apartments and tight closets
    • Confirm ventless condensation requirements
    • Check capacity before replacing full-size units

    View Compact Dryers

    As an Amazon Associate, we earn from qualifying purchases.

    Still Not Working?
    If the replacement part didn’t fix the issue, you may have a wiring problem or main board failure.


    Browse all Electrolux error codes: Electrolux Error Codes
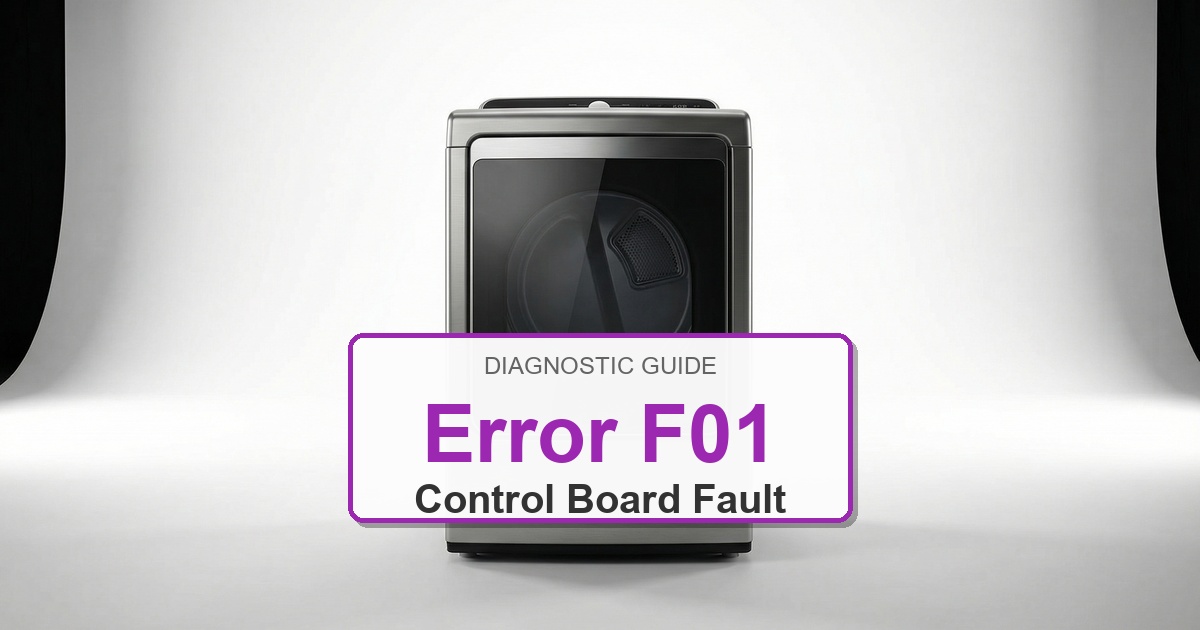
  • How to Fix Electrolux Dryer Error F01

    How to Fix Electrolux Dryer Error F01

    Error Code: F01 Difficulty: Hard

    Problem: Internal fault in the control.

    How to Fix F01 Error (Step-by-Step)

    1. Disconnect the dryer from its power supply and confirm the error stays cleared during a full test cycle.
    2. The F01 code indicates an internal failure of the main control board. Access the control board by removing the top panel of the dryer.
    3. Before replacing, visually inspect the control board for any obvious signs of damage, such as burn marks or loose connections. Re-seat any loose connectors.
    4. If no visible issues are found, the control board needs to be replaced. Carefully disconnect all wire harnesses from the old board.
    5. Remove the screws securing the control board and take it out.
    6. Place the new control board in the same position and secure it with the screws.
    7. Reconnect all the wire harnesses to the new board, ensuring each is in the correct spot, then reattach the top panel.
    8. Turn the appliance off, wait about 2 minutes, then turn it back on.

    What to Check Next on This Electrolux Dryer

    Focused repair path: dryer airflow, heating, motor, sensor, and control checks. Do not treat the fault as reset-only if it keeps returning; use the failed function to choose the next test.

    1. Disconnect power before opening panels, then confirm whether the Electrolux dryer repeats the same code after a clean reset.
    2. Match the symptom to the part of the cycle or function that fails: fill, drain, heat, cool, spin, latch, ignite, fan, sensor, or control response.
    3. Inspect simple causes first: airflow, water supply, drain path, door closure, filter, venting, wiring connectors, and visible damage.
    4. Use meter testing or service diagnostics before replacing electronic controls, because wiring, switches, sensors, and loads can mimic board failure.
    5. Use the complete Electrolux dryer model number from the appliance tag before ordering any model-specific part.

    Check, inspect, clean, test, measure, remove, reconnect, clear, and replace parts only when the symptom supports that path. If these checks point toward a part, verify the complete Electrolux model number from the appliance tag before ordering.

    Verified Compatible Alternatives:

    • A14471803
    • 5304510361

    When It’s Better to Replace Than Repair

    Dryer repairs are often worth it for small parts, but repeated heating, motor, drum, or control failures can point toward replacement.
    Confirm gas vs electric, venting, voltage, doorway clearance, and laundry-space dimensions before ordering.
    For repair parts, verify exact fit with the full dryer model number before buying; these links are general replacement-appliance shopping options.

    • [OK]Thermal fuse or heater failures keep returning
    • [OK]Belt, roller, or motor repairs exceed unit value
    • [OK]Door switch or control issues stack with other faults
    • [OK]Older dryer has long dry times even after vent cleaning

    Recommended Dryer Replacement Options

    Electric Dryers

    240V Vented Models

    • Most common electric replacement type
    • Confirm 3-prong vs 4-prong cord needs
    • Verify vent path and laundry-space depth

    Shop Electric Dryers

    Gas Dryers

    Natural Gas Dryer Options

    • Confirm gas supply and shutoff location
    • Use qualified installation when required
    • Do not substitute electric for gas without planning

    Compare Gas Dryers

    Compact and Ventless

    Small-Space Dryer Choices

    • Good for apartments and tight closets
    • Confirm ventless condensation requirements
    • Check capacity before replacing full-size units

    View Compact Dryers

    As an Amazon Associate, we earn from qualifying purchases.

    Still Not Working?
    If the replacement part didn’t fix the issue, you may have a wiring problem or main board failure.


    Browse all Electrolux error codes: Electrolux Error Codes
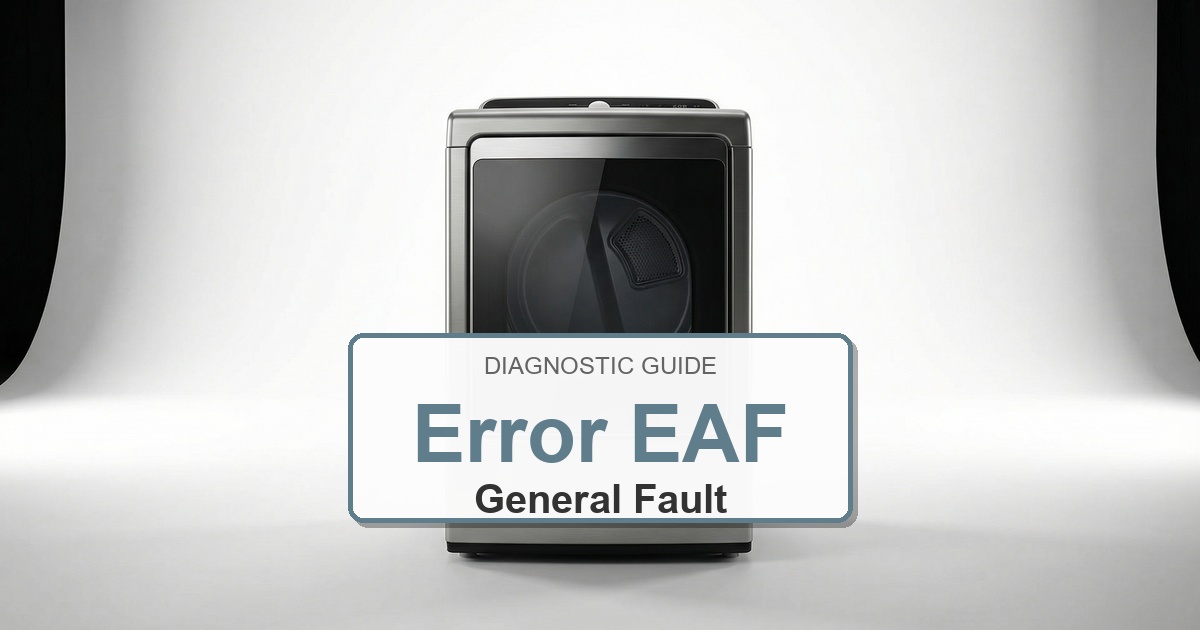
  • How to Fix Electrolux Dryer Error EAF

    How to Fix Electrolux Dryer Error EAF

    Error Code: EAF Difficulty: Hard

    Problem: Watchdog reset.

    How to Fix EAF Error (Step-by-Step)

    1. Disconnect the dryer from the power source by unplugging it from the wall outlet. If it’s hardwired, turn off the corresponding breaker in your home’s electrical panel.
    2. Access the electronic control board. This is typically located behind the main control panel. You may need to remove the top panel of the dryer by unscrewing the screws at the back or top edge.
    3. Before touching any wires, take a clear picture of the wire connections to the old control board. This will be your reference for connecting the new board.
    4. Carefully disconnect all the wire harnesses from the old control board. Most connectors have a small locking tab that you need to press to release them.
    5. Remove the screws or release the clips holding the old control board in place and lift it out.
    6. Install the new electronic control board, securing it with the same screws or clips. Reconnect all the wire harnesses by referring to the picture you took earlier, ensuring each connector is firmly seated.
    7. Reassemble the dryer by replacing the top panel and any other parts you removed, and then restore power to the appliance.
    8. Turn the appliance off, wait about 2 minutes, then turn it back on.

    What to Check Next on This Electrolux Dryer

    Focused repair path: dryer airflow, heating, motor, sensor, and control checks. Do not treat the fault as reset-only if it keeps returning; use the failed function to choose the next test.

    1. Disconnect power before opening panels, then confirm whether the Electrolux dryer repeats the same code after a clean reset.
    2. Match the symptom to the part of the cycle or function that fails: fill, drain, heat, cool, spin, latch, ignite, fan, sensor, or control response.
    3. Inspect simple causes first: airflow, water supply, drain path, door closure, filter, venting, wiring connectors, and visible damage.
    4. Use meter testing or service diagnostics before replacing electronic controls, because wiring, switches, sensors, and loads can mimic board failure.
    5. Use the complete Electrolux dryer model number from the appliance tag before ordering any model-specific part.

    Check, inspect, clean, test, measure, remove, reconnect, clear, and replace parts only when the symptom supports that path. If these checks point toward a part, verify the complete Electrolux model number from the appliance tag before ordering.

    Parts Availability Note: For this Electrolux/Frigidaire error code, exact OEM part numbers can vary by model revision and serial range. We’ve listed the most likely component(s), but confirm compatibility using your full model number before ordering. If no exact SKU is shown, use this guide for diagnosis first, then verify the matching OEM part on RepairClinic or PartSelect.

    Recommended Parts to Check

    No exact official OEM part number is listed here because the correct Electrolux dryer part can vary by complete model number. These are targeted part-category searches, not universal fit claims.

    • Electrolux dryer thermal fuse
      Common replacement category: Thermal fuse
      Fit note: Exact OEM part number varies by complete Electrolux dryer model number. Confirm compatibility before buying.
      Why this category can matter: no-heat or no-start symptoms after venting and power checks.

      Search Amazon for Electrolux dryer thermal fuse

    • Electrolux dryer heating element
      Common replacement category: Heating element
      Fit note: Exact OEM part number varies by complete Electrolux dryer model number. Confirm compatibility before buying.
      Why this category can matter: electric dryer no-heat symptoms after airflow checks.

      Search Amazon for Electrolux dryer heating element

    • Electrolux dryer door switch
      Common replacement category: Door switch
      Fit note: Exact OEM part number varies by complete Electrolux dryer model number. Confirm compatibility before buying.
      Why this category can matter: start or cycle-interrupt symptoms tied to door movement.

      Search Amazon for Electrolux dryer door switch

    Before ordering: match the part to the complete Electrolux dryer model number on the appliance tag.

    When It’s Better to Replace Than Repair

    Dryer repairs are often worth it for small parts, but repeated heating, motor, drum, or control failures can point toward replacement.
    Confirm gas vs electric, venting, voltage, doorway clearance, and laundry-space dimensions before ordering.
    For repair parts, verify exact fit with the full dryer model number before buying; these links are general replacement-appliance shopping options.

    • [OK]Thermal fuse or heater failures keep returning
    • [OK]Belt, roller, or motor repairs exceed unit value
    • [OK]Door switch or control issues stack with other faults
    • [OK]Older dryer has long dry times even after vent cleaning

    Recommended Dryer Replacement Options

    Electric Dryers

    240V Vented Models

    • Most common electric replacement type
    • Confirm 3-prong vs 4-prong cord needs
    • Verify vent path and laundry-space depth

    Shop Electric Dryers

    Gas Dryers

    Natural Gas Dryer Options

    • Confirm gas supply and shutoff location
    • Use qualified installation when required
    • Do not substitute electric for gas without planning

    Compare Gas Dryers

    Compact and Ventless

    Small-Space Dryer Choices

    • Good for apartments and tight closets
    • Confirm ventless condensation requirements
    • Check capacity before replacing full-size units

    View Compact Dryers

    As an Amazon Associate, we earn from qualifying purchases.

    Still Not Working?
    If the replacement part didn’t fix the issue, you may have a wiring problem or main board failure.


    Browse all Electrolux error codes: Electrolux Error Codes
  • How to Fix Electrolux Dryer Error E71 / E72

    How to Fix Electrolux Dryer Error E71 / E72

    Error Code: E71 / E72 Difficulty: Moderate

    Problem: Outlet thermistor failure.

    How to Fix E71 / E72 Error (Step-by-Step)

    1. Unplug the dryer from the electrical outlet and confirm the error stays cleared during a full test cycle.
    2. Locate the outlet thermistor, which is typically found on the blower housing or near the exhaust vent.
    3. Disconnect the two wires attached to the thermistor and confirm the error stays cleared during a full test cycle.
    4. Use a multimeter to test the thermistor for continuity. A reading of approximately 50,000 ohms at room temperature indicates it is functioning correctly. If the reading is significantly different or shows no continuity, the thermistor needs replacement.
    5. If the thermistor is faulty, remove the screw holding it in place and install the new one.
    6. Reconnect the wires to the new thermistor and reassemble the dryer.
    7. Plug the dryer back in and run a test cycle to ensure the error is cleared.
    8. Turn the appliance off, wait about 2 minutes, then turn it back on.

    Verified Compatible Alternatives:

    • 134711200
    • 808137001

    Still Not Working?
    If the replacement part didn’t fix the issue, you may have a wiring problem or main board failure.


    Browse all Electrolux error codes: Electrolux Error Codes
  • How to Fix Electrolux Dryer Error E52

    How to Fix Electrolux Dryer Error E52

    Error Code: E52 Difficulty: Hard

    Problem: Motor stopped or not starting.

    How to Fix E52 Error (Step-by-Step)

    1. Disconnect the dryer from the power source to ensure safety.
    2. Access the dryer’s motor by removing the necessary panels, which may include the top and front panels.
    3. Carefully inspect the wiring connected to the motor for any signs of damage, such as burns or breaks. Reconnect any loose wires.
    4. If the wiring appears intact, the motor itself is likely faulty and needs to be replaced.
    5. Disconnect the wires from the old motor, and remove the mounting hardware that secures it in place.
    6. Install the new motor, ensuring it is securely mounted, and reconnect the wiring as it was on the original motor.
    7. Reassemble the dryer panels and reconnect the appliance to the power source to test its operation.
    8. Turn the appliance off, wait about 2 minutes, then turn it back on.

    What to Check Next on This Electrolux Dryer

    Focused repair path: dryer airflow, heating, motor, sensor, and control checks. Do not treat the fault as reset-only if it keeps returning; use the failed function to choose the next test.

    1. Disconnect power before opening panels, then confirm whether the Electrolux dryer repeats the same code after a clean reset.
    2. Match the symptom to the part of the cycle or function that fails: fill, drain, heat, cool, spin, latch, ignite, fan, sensor, or control response.
    3. Inspect simple causes first: airflow, water supply, drain path, door closure, filter, venting, wiring connectors, and visible damage.
    4. Use meter testing or service diagnostics before replacing electronic controls, because wiring, switches, sensors, and loads can mimic board failure.
    5. Use the complete Electrolux dryer model number from the appliance tag before ordering any model-specific part.

    Check, inspect, clean, test, measure, remove, reconnect, clear, and replace parts only when the symptom supports that path. If these checks point toward a part, verify the complete Electrolux model number from the appliance tag before ordering.

    Verified Compatible Alternatives:

    • 134196602
    • 5304529782

    When It’s Better to Replace Than Repair

    Dryer repairs are often worth it for small parts, but repeated heating, motor, drum, or control failures can point toward replacement.
    Confirm gas vs electric, venting, voltage, doorway clearance, and laundry-space dimensions before ordering.
    For repair parts, verify exact fit with the full dryer model number before buying; these links are general replacement-appliance shopping options.

    • [OK]Thermal fuse or heater failures keep returning
    • [OK]Belt, roller, or motor repairs exceed unit value
    • [OK]Door switch or control issues stack with other faults
    • [OK]Older dryer has long dry times even after vent cleaning

    Recommended Dryer Replacement Options

    Electric Dryers

    240V Vented Models

    • Most common electric replacement type
    • Confirm 3-prong vs 4-prong cord needs
    • Verify vent path and laundry-space depth

    Shop Electric Dryers

    Gas Dryers

    Natural Gas Dryer Options

    • Confirm gas supply and shutoff location
    • Use qualified installation when required
    • Do not substitute electric for gas without planning

    Compare Gas Dryers

    Compact and Ventless

    Small-Space Dryer Choices

    • Good for apartments and tight closets
    • Confirm ventless condensation requirements
    • Check capacity before replacing full-size units

    View Compact Dryers

    As an Amazon Associate, we earn from qualifying purchases.

    Still Not Working?
    If the replacement part didn’t fix the issue, you may have a wiring problem or main board failure.


    Browse all Electrolux error codes: Electrolux Error Codes