Author: ApplianceFixGuide Team

  • How to Fix Electrolux Dryer Error E15

    How to Fix Electrolux Dryer Error E15

    Error Code: E15 Difficulty: Easy

    Problem: Vacuum switch – The vacuum switch does not shut within 5 seconds after the dryer is started.

    How to Fix E15 Error (Step-by-Step)

    1. Unplug the dryer from the wall outlet for safety and confirm the error stays cleared during a full test cycle.
    2. Disconnect the flexible vent hose from the back of the dryer.
    3. Look inside the hose and the dryer’s exhaust port for any heavy accumulation of lint and clean it out.
    4. Go outside and check the exterior vent cap. Ensure the damper flap is not stuck shut and clear away any lint, leaves, or other debris.
    5. For long vent runs, it may be necessary to use a vent cleaning brush kit to clear the entire length of the ducting in the wall.
    6. Once the entire vent path is clear, securely reattach the hose, plug the dryer in, and run a test cycle.
    7. Turn the appliance off, wait about 2 minutes, then turn it back on.

    What to Check Next on This Electrolux Dryer

    Focused repair path: dryer airflow, heating, motor, sensor, and control checks. Do not treat the fault as reset-only if it keeps returning; use the failed function to choose the next test.

    1. Disconnect power before opening panels, then confirm whether the Electrolux dryer repeats the same code after a clean reset.
    2. Match the symptom to the part of the cycle or function that fails: fill, drain, heat, cool, spin, latch, ignite, fan, sensor, or control response.
    3. Inspect simple causes first: airflow, water supply, drain path, door closure, filter, venting, wiring connectors, and visible damage.
    4. Use meter testing or service diagnostics before replacing electronic controls, because wiring, switches, sensors, and loads can mimic board failure.
    5. Use the complete Electrolux dryer model number from the appliance tag before ordering any model-specific part.

    Check, inspect, clean, test, measure, remove, reconnect, clear, and replace parts only when the symptom supports that path. If these checks point toward a part, verify the complete Electrolux model number from the appliance tag before ordering.

    Recommended Parts to Check

    No exact official OEM part number is listed here because the correct Electrolux dryer part can vary by complete model number. These are targeted part-category searches, not universal fit claims.

    • Electrolux dryer thermal fuse
      Common replacement category: Thermal fuse
      Fit note: Exact OEM part number varies by complete Electrolux dryer model number. Confirm compatibility before buying.
      Why this category can matter: no-heat or no-start symptoms after venting and power checks.

      Search Amazon for Electrolux dryer thermal fuse

    • Electrolux dryer heating element
      Common replacement category: Heating element
      Fit note: Exact OEM part number varies by complete Electrolux dryer model number. Confirm compatibility before buying.
      Why this category can matter: electric dryer no-heat symptoms after airflow checks.

      Search Amazon for Electrolux dryer heating element

    • Electrolux dryer door switch
      Common replacement category: Door switch
      Fit note: Exact OEM part number varies by complete Electrolux dryer model number. Confirm compatibility before buying.
      Why this category can matter: start or cycle-interrupt symptoms tied to door movement.

      Search Amazon for Electrolux dryer door switch

    Before ordering: match the part to the complete Electrolux dryer model number on the appliance tag.

    When It’s Better to Replace Than Repair

    Dryer repairs are often worth it for small parts, but repeated heating, motor, drum, or control failures can point toward replacement.
    Confirm gas vs electric, venting, voltage, doorway clearance, and laundry-space dimensions before ordering.
    For repair parts, verify exact fit with the full dryer model number before buying; these links are general replacement-appliance shopping options.

    • [OK]Thermal fuse or heater failures keep returning
    • [OK]Belt, roller, or motor repairs exceed unit value
    • [OK]Door switch or control issues stack with other faults
    • [OK]Older dryer has long dry times even after vent cleaning

    Recommended Dryer Replacement Options

    Electric Dryers

    240V Vented Models

    • Most common electric replacement type
    • Confirm 3-prong vs 4-prong cord needs
    • Verify vent path and laundry-space depth

    Shop Electric Dryers

    Gas Dryers

    Natural Gas Dryer Options

    • Confirm gas supply and shutoff location
    • Use qualified installation when required
    • Do not substitute electric for gas without planning

    Compare Gas Dryers

    Compact and Ventless

    Small-Space Dryer Choices

    • Good for apartments and tight closets
    • Confirm ventless condensation requirements
    • Check capacity before replacing full-size units

    View Compact Dryers

    As an Amazon Associate, we earn from qualifying purchases.

    Still Not Working?
    If the replacement part didn’t fix the issue, you may have a wiring problem or main board failure.


    Browse all Electrolux error codes: Electrolux Error Codes
  • How to Fix Electrolux Dryer Error E00

    How to Fix Electrolux Dryer Error E00

    Error Code: E00 Difficulty: Easy

    Problem: No error detected during the last cycle.

    How to Fix E00 Error (Step-by-Step)

    1. This code is informational and simply means the last drying cycle finished without any problems being detected by the system.
    2. No repair or action is needed from you and confirm the error stays cleared during a full test cycle.
    3. To clear the code from the display, press the ‘Power’ or ‘Cancel’ button.
    4. After clearing the code, you can load the dryer and start a new cycle as you normally would.
    5. Turn the appliance off, wait about 2 minutes, then turn it back on.
    6. Check for simple blockages (lint screen, drain path, or filter) and clean anything you find.
    7. Make sure all doors, lids, and hoses are fully closed and seated correctly.

    What to Check Next on This Electrolux Dryer

    Focused repair path: dryer airflow, heating, motor, sensor, and control checks. Do not treat the fault as reset-only if it keeps returning; use the failed function to choose the next test.

    1. Disconnect power before opening panels, then confirm whether the Electrolux dryer repeats the same code after a clean reset.
    2. Match the symptom to the part of the cycle or function that fails: fill, drain, heat, cool, spin, latch, ignite, fan, sensor, or control response.
    3. Inspect simple causes first: airflow, water supply, drain path, door closure, filter, venting, wiring connectors, and visible damage.
    4. Use meter testing or service diagnostics before replacing electronic controls, because wiring, switches, sensors, and loads can mimic board failure.
    5. Use the complete Electrolux dryer model number from the appliance tag before ordering any model-specific part.

    Check, inspect, clean, test, measure, remove, reconnect, clear, and replace parts only when the symptom supports that path. If these checks point toward a part, verify the complete Electrolux model number from the appliance tag before ordering.

    Recommended Parts to Check

    No exact official OEM part number is listed here because the correct Electrolux dryer part can vary by complete model number. These are targeted part-category searches, not universal fit claims.

    • Electrolux dryer thermal fuse
      Common replacement category: Thermal fuse
      Fit note: Exact OEM part number varies by complete Electrolux dryer model number. Confirm compatibility before buying.
      Why this category can matter: no-heat or no-start symptoms after venting and power checks.

      Search Amazon for Electrolux dryer thermal fuse

    • Electrolux dryer heating element
      Common replacement category: Heating element
      Fit note: Exact OEM part number varies by complete Electrolux dryer model number. Confirm compatibility before buying.
      Why this category can matter: electric dryer no-heat symptoms after airflow checks.

      Search Amazon for Electrolux dryer heating element

    • Electrolux dryer door switch
      Common replacement category: Door switch
      Fit note: Exact OEM part number varies by complete Electrolux dryer model number. Confirm compatibility before buying.
      Why this category can matter: start or cycle-interrupt symptoms tied to door movement.

      Search Amazon for Electrolux dryer door switch

    Before ordering: match the part to the complete Electrolux dryer model number on the appliance tag.

    When It’s Better to Replace Than Repair

    Dryer repairs are often worth it for small parts, but repeated heating, motor, drum, or control failures can point toward replacement.
    Confirm gas vs electric, venting, voltage, doorway clearance, and laundry-space dimensions before ordering.
    For repair parts, verify exact fit with the full dryer model number before buying; these links are general replacement-appliance shopping options.

    • [OK]Thermal fuse or heater failures keep returning
    • [OK]Belt, roller, or motor repairs exceed unit value
    • [OK]Door switch or control issues stack with other faults
    • [OK]Older dryer has long dry times even after vent cleaning

    Recommended Dryer Replacement Options

    Electric Dryers

    240V Vented Models

    • Most common electric replacement type
    • Confirm 3-prong vs 4-prong cord needs
    • Verify vent path and laundry-space depth

    Shop Electric Dryers

    Gas Dryers

    Natural Gas Dryer Options

    • Confirm gas supply and shutoff location
    • Use qualified installation when required
    • Do not substitute electric for gas without planning

    Compare Gas Dryers

    Compact and Ventless

    Small-Space Dryer Choices

    • Good for apartments and tight closets
    • Confirm ventless condensation requirements
    • Check capacity before replacing full-size units

    View Compact Dryers

    As an Amazon Associate, we earn from qualifying purchases.

    Still Not Working?
    If the replacement part didn’t fix the issue, you may have a wiring problem or main board failure.


    Browse all Electrolux error codes: Electrolux Error Codes
  • How to Fix Electrolux Dryer Error CL

    How to Fix Electrolux Dryer Error CL

    Error Code: CL Difficulty: Easy

    Problem: Close door – door switch error.

    How to Fix CL Error (Step-by-Step)

    1. Open the dryer door and check for any clothes, lint, or other items that might be blocking the door from closing completely.
    2. Inspect the area around the door latch and the opening on the dryer frame. Clean away any lint or debris with a cloth.
    3. Close the door firmly, making sure you hear a distinct ‘click’ sound, which indicates the latch has engaged properly.
    4. If the door appears closed but the error persists, gently press on the door to ensure the switch is fully activated.
    5. Visually inspect the plastic door latch and the metal strike on the dryer body for any signs of cracking, breakage, or misalignment. If damage is found, the door latch assembly may need to be replaced.
    6. Turn the appliance off, wait about 2 minutes, then turn it back on.
    7. Check for simple blockages (lint screen, drain path, or filter) and clean anything you find.

    What to Check Next on This Electrolux Dryer

    Focused repair path: dryer airflow, heating, motor, sensor, and control checks. Do not treat the fault as reset-only if it keeps returning; use the failed function to choose the next test.

    1. Disconnect power before opening panels, then confirm whether the Electrolux dryer repeats the same code after a clean reset.
    2. Match the symptom to the part of the cycle or function that fails: fill, drain, heat, cool, spin, latch, ignite, fan, sensor, or control response.
    3. Inspect simple causes first: airflow, water supply, drain path, door closure, filter, venting, wiring connectors, and visible damage.
    4. Use meter testing or service diagnostics before replacing electronic controls, because wiring, switches, sensors, and loads can mimic board failure.
    5. Use the complete Electrolux dryer model number from the appliance tag before ordering any model-specific part.

    Check, inspect, clean, test, measure, remove, reconnect, clear, and replace parts only when the symptom supports that path. If these checks point toward a part, verify the complete Electrolux model number from the appliance tag before ordering.

    Recommended Parts to Check

    No exact official OEM part number is listed here because the correct Electrolux dryer part can vary by complete model number. These are targeted part-category searches, not universal fit claims.

    • Electrolux dryer thermal fuse
      Common replacement category: Thermal fuse
      Fit note: Exact OEM part number varies by complete Electrolux dryer model number. Confirm compatibility before buying.
      Why this category can matter: no-heat or no-start symptoms after venting and power checks.

      Search Amazon for Electrolux dryer thermal fuse

    • Electrolux dryer heating element
      Common replacement category: Heating element
      Fit note: Exact OEM part number varies by complete Electrolux dryer model number. Confirm compatibility before buying.
      Why this category can matter: electric dryer no-heat symptoms after airflow checks.

      Search Amazon for Electrolux dryer heating element

    • Electrolux dryer door switch
      Common replacement category: Door switch
      Fit note: Exact OEM part number varies by complete Electrolux dryer model number. Confirm compatibility before buying.
      Why this category can matter: start or cycle-interrupt symptoms tied to door movement.

      Search Amazon for Electrolux dryer door switch

    Before ordering: match the part to the complete Electrolux dryer model number on the appliance tag.

    When It’s Better to Replace Than Repair

    Dryer repairs are often worth it for small parts, but repeated heating, motor, drum, or control failures can point toward replacement.
    Confirm gas vs electric, venting, voltage, doorway clearance, and laundry-space dimensions before ordering.
    For repair parts, verify exact fit with the full dryer model number before buying; these links are general replacement-appliance shopping options.

    • [OK]Thermal fuse or heater failures keep returning
    • [OK]Belt, roller, or motor repairs exceed unit value
    • [OK]Door switch or control issues stack with other faults
    • [OK]Older dryer has long dry times even after vent cleaning

    Recommended Dryer Replacement Options

    Electric Dryers

    240V Vented Models

    • Most common electric replacement type
    • Confirm 3-prong vs 4-prong cord needs
    • Verify vent path and laundry-space depth

    Shop Electric Dryers

    Gas Dryers

    Natural Gas Dryer Options

    • Confirm gas supply and shutoff location
    • Use qualified installation when required
    • Do not substitute electric for gas without planning

    Compare Gas Dryers

    Compact and Ventless

    Small-Space Dryer Choices

    • Good for apartments and tight closets
    • Confirm ventless condensation requirements
    • Check capacity before replacing full-size units

    View Compact Dryers

    As an Amazon Associate, we earn from qualifying purchases.

    Still Not Working?
    If the replacement part didn’t fix the issue, you may have a wiring problem or main board failure.


    Browse all Electrolux error codes: Electrolux Error Codes
  • How to Fix Amana Dryer Error F50

    How to Fix Amana Dryer Error F50

    Error Code: F50 Difficulty: Moderate

    Problem: General error requiring a power cycle.

    How to Fix F50 Error (Step-by-Step)

    1. First, perform a power cycle by unplugging your dryer from the wall outlet.
    2. Wait for at least 5 minutes to allow the internal electronics to fully reset.
    3. Plug the dryer back into the outlet and attempt to start a cycle.
    4. If the code reappears, unplug the dryer again and remove the rear service panel to access the thermal fuse, which is a small, white, non-resettable fuse on the blower housing.
    5. Use a multimeter to test the thermal fuse for continuity. If the multimeter does not show a continuous electrical path, the fuse has blown and needs to be replaced.
    6. If the thermal fuse is good, the issue may be with the main control board, which requires professional replacement.
    7. Turn the appliance off, wait about 2 minutes, then turn it back on.

    What to Check Next on This Amana Dryer

    Focused repair path: dryer airflow, heating, sensor, motor, door switch, belt, and control checks. Do not treat a returning fault as a reset-only problem; use the point in the cycle where the fault appears to choose the next check.

    1. Disconnect power before inspection, then clear the lint screen, blower area, vent run, and exterior hood before replacing heat parts.
    2. Confirm whether the dryer starts, tumbles, heats, and advances through the cycle; the missing function narrows the repair path.
    3. For heat faults, inspect airflow first, then the thermal fuse, thermistor, element or gas ignition path, wiring, and control output.
    4. For start or tumble faults, check the door switch, belt switch, motor circuit, harness, and control connections before ordering parts.

    Check, inspect, clean, test, measure, remove, reconnect, clear, and replace parts only when the symptom supports that path. If these checks point toward a part, verify the complete Amana model number from the appliance tag before ordering. Similar error wording can use different valves, sensors, pumps, motors, heaters, locks, switches, fans, or control boards depending on the exact model.

    &tag=appliancefixg-20

    Verified Compatible Alternatives:

    • W11537223

    When It’s Better to Replace Than Repair

    Dryer repairs are often worth it for small parts, but repeated heating, motor, drum, or control failures can point toward replacement.
    Confirm gas vs electric, venting, voltage, doorway clearance, and laundry-space dimensions before ordering.
    For repair parts, verify exact fit with the full dryer model number before buying; these links are general replacement-appliance shopping options.

    • [OK]Thermal fuse or heater failures keep returning
    • [OK]Belt, roller, or motor repairs exceed unit value
    • [OK]Door switch or control issues stack with other faults
    • [OK]Older dryer has long dry times even after vent cleaning

    Recommended Dryer Replacement Options

    Electric Dryers

    240V Vented Models

    • Most common electric replacement type
    • Confirm 3-prong vs 4-prong cord needs
    • Verify vent path and laundry-space depth

    Shop Electric Dryers

    Gas Dryers

    Natural Gas Dryer Options

    • Confirm gas supply and shutoff location
    • Use qualified installation when required
    • Do not substitute electric for gas without planning

    Compare Gas Dryers

    Compact and Ventless

    Small-Space Dryer Choices

    • Good for apartments and tight closets
    • Confirm ventless condensation requirements
    • Check capacity before replacing full-size units

    View Compact Dryers

    As an Amazon Associate, we earn from qualifying purchases.

    Still Not Working?
    If the replacement part didn’t fix the issue, you may have a wiring problem or main board failure.


    Browse all Amana error codes: Amana Error Codes

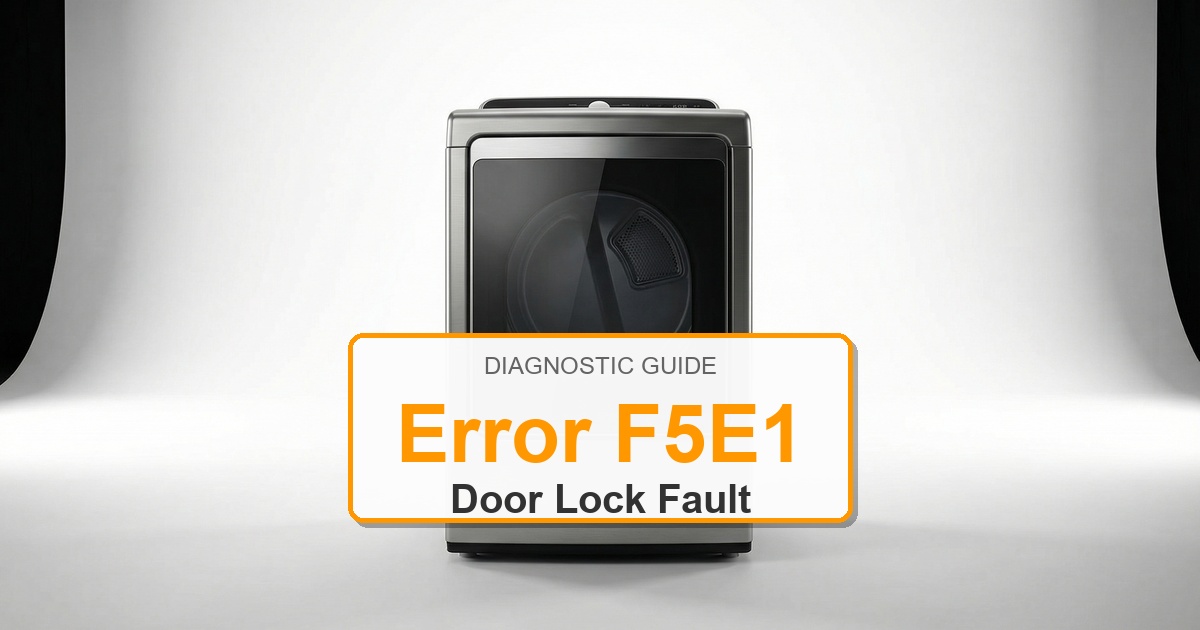
  • How to Fix Amana Dryer Error F5E1

    How to Fix Amana Dryer Error F5E1

    Error Code: F5E1 Difficulty: Moderate

    Problem: A problem with the door switch has been detected.

    How to Fix F5E1 Error (Step-by-Step)

    1. Disconnect the dryer from the power source completely and confirm the error stays cleared during a full test cycle.
    2. Open the dryer door and locate the door switch, typically found along the frame where the door closes.
    3. Remove the screws holding the switch in place. You may need to use a putty knife to gently pry open the top or front panel to gain access.
    4. Carefully pull the switch out and disconnect the wire harness attached to it.
    5. Test the old switch with a multimeter. When the actuator button is pressed, you should have continuity across the terminals. If not, the switch is faulty.
    6. Connect the new door switch to the wire harness, secure it in its housing with the screws, and reassemble any panels you removed.
    7. Reconnect power and test the dryer and confirm the error stays cleared during a full test cycle.
    8. Turn the appliance off, wait about 2 minutes, then turn it back on.

    What to Check Next on This Amana Dryer

    Focused repair path: dryer airflow, heating, sensor, motor, door switch, belt, and control checks. Do not treat a returning fault as a reset-only problem; use the point in the cycle where the fault appears to choose the next check.

    1. Disconnect power before inspection, then clear the lint screen, blower area, vent run, and exterior hood before replacing heat parts.
    2. Confirm whether the dryer starts, tumbles, heats, and advances through the cycle; the missing function narrows the repair path.
    3. For heat faults, inspect airflow first, then the thermal fuse, thermistor, element or gas ignition path, wiring, and control output.
    4. For start or tumble faults, check the door switch, belt switch, motor circuit, harness, and control connections before ordering parts.

    Check, inspect, clean, test, measure, remove, reconnect, clear, and replace parts only when the symptom supports that path. If these checks point toward a part, verify the complete Amana model number from the appliance tag before ordering. Similar error wording can use different valves, sensors, pumps, motors, heaters, locks, switches, fans, or control boards depending on the exact model.

    &tag=appliancefixg-20

    Verified Compatible Alternatives:

    • WP3406107

    When It’s Better to Replace Than Repair

    Dryer repairs are often worth it for small parts, but repeated heating, motor, drum, or control failures can point toward replacement.
    Confirm gas vs electric, venting, voltage, doorway clearance, and laundry-space dimensions before ordering.
    For repair parts, verify exact fit with the full dryer model number before buying; these links are general replacement-appliance shopping options.

    • [OK]Thermal fuse or heater failures keep returning
    • [OK]Belt, roller, or motor repairs exceed unit value
    • [OK]Door switch or control issues stack with other faults
    • [OK]Older dryer has long dry times even after vent cleaning

    Recommended Dryer Replacement Options

    Electric Dryers

    240V Vented Models

    • Most common electric replacement type
    • Confirm 3-prong vs 4-prong cord needs
    • Verify vent path and laundry-space depth

    Shop Electric Dryers

    Gas Dryers

    Natural Gas Dryer Options

    • Confirm gas supply and shutoff location
    • Use qualified installation when required
    • Do not substitute electric for gas without planning

    Compare Gas Dryers

    Compact and Ventless

    Small-Space Dryer Choices

    • Good for apartments and tight closets
    • Confirm ventless condensation requirements
    • Check capacity before replacing full-size units

    View Compact Dryers

    As an Amazon Associate, we earn from qualifying purchases.

    Still Not Working?
    If the replacement part didn’t fix the issue, you may have a wiring problem or main board failure.


    Browse all Amana error codes: Amana Error Codes

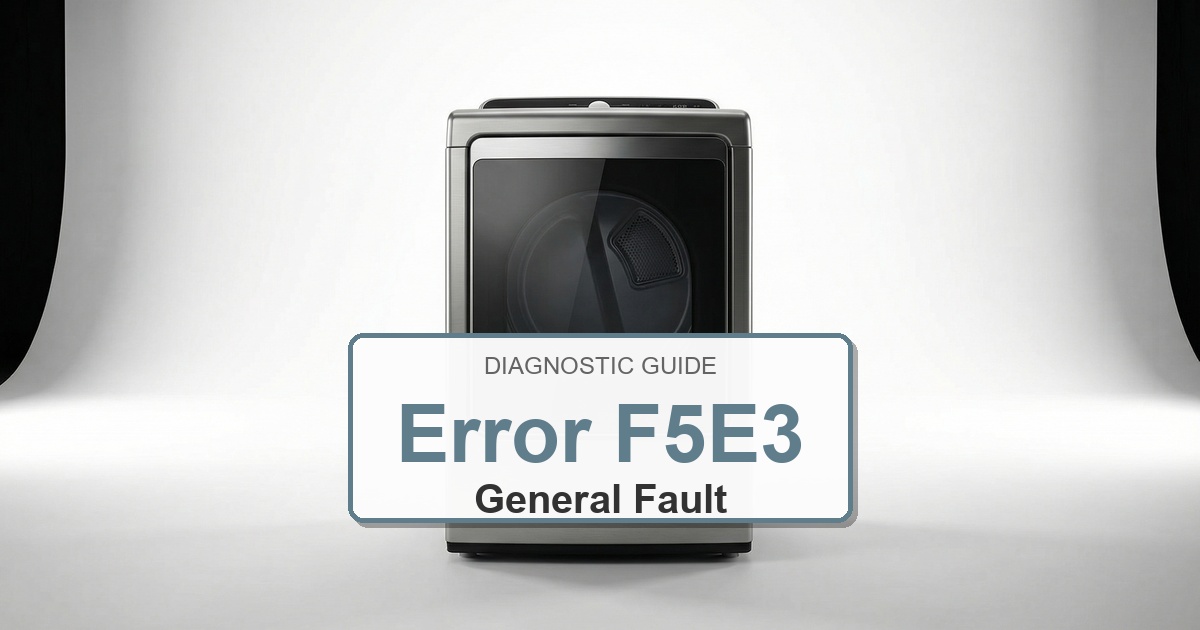
  • How to Fix Amana Dryer Error F5E3

    How to Fix Amana Dryer Error F5E3

    Error Code: F5E3 Difficulty: Moderate

    Problem: Latch circuit failure.

    How to Fix F5E3 Error (Step-by-Step)

    1. Unplug the dryer from the electrical outlet to ensure safety.
    2. Open the dryer door to inspect the door latch mechanism, which includes the catch on the door and the strike on the dryer body.
    3. Check for any visible damage, wear, or debris that might be preventing the latch from engaging correctly.
    4. To replace the latch, you will typically need to remove the screws holding the inner door panel to access the door catch assembly.
    5. Remove the old catch and strike. The kit often includes several latch and strike options; match the new parts to your old ones.
    6. Install the new door catch on the door and the new strike on the dryer frame, ensuring they are aligned properly.
    7. Close the door to test if it latches securely before plugging the dryer back in.
    8. Turn the appliance off, wait about 2 minutes, then turn it back on.

    What to Check Next on This Amana Dryer

    Focused repair path: dryer airflow, heating, sensor, motor, door switch, belt, and control checks. Do not treat a returning fault as a reset-only problem; use the point in the cycle where the fault appears to choose the next check.

    1. Disconnect power before inspection, then clear the lint screen, blower area, vent run, and exterior hood before replacing heat parts.
    2. Confirm whether the dryer starts, tumbles, heats, and advances through the cycle; the missing function narrows the repair path.
    3. For heat faults, inspect airflow first, then the thermal fuse, thermistor, element or gas ignition path, wiring, and control output.
    4. For start or tumble faults, check the door switch, belt switch, motor circuit, harness, and control connections before ordering parts.

    Check, inspect, clean, test, measure, remove, reconnect, clear, and replace parts only when the symptom supports that path. If these checks point toward a part, verify the complete Amana model number from the appliance tag before ordering. Similar error wording can use different valves, sensors, pumps, motors, heaters, locks, switches, fans, or control boards depending on the exact model.

    &tag=appliancefixg-20

    Verified Compatible Alternatives:

    • 306436

    When It’s Better to Replace Than Repair

    Dryer repairs are often worth it for small parts, but repeated heating, motor, drum, or control failures can point toward replacement.
    Confirm gas vs electric, venting, voltage, doorway clearance, and laundry-space dimensions before ordering.
    For repair parts, verify exact fit with the full dryer model number before buying; these links are general replacement-appliance shopping options.

    • [OK]Thermal fuse or heater failures keep returning
    • [OK]Belt, roller, or motor repairs exceed unit value
    • [OK]Door switch or control issues stack with other faults
    • [OK]Older dryer has long dry times even after vent cleaning

    Recommended Dryer Replacement Options

    Electric Dryers

    240V Vented Models

    • Most common electric replacement type
    • Confirm 3-prong vs 4-prong cord needs
    • Verify vent path and laundry-space depth

    Shop Electric Dryers

    Gas Dryers

    Natural Gas Dryer Options

    • Confirm gas supply and shutoff location
    • Use qualified installation when required
    • Do not substitute electric for gas without planning

    Compare Gas Dryers

    Compact and Ventless

    Small-Space Dryer Choices

    • Good for apartments and tight closets
    • Confirm ventless condensation requirements
    • Check capacity before replacing full-size units

    View Compact Dryers

    As an Amazon Associate, we earn from qualifying purchases.

    Still Not Working?
    If the replacement part didn’t fix the issue, you may have a wiring problem or main board failure.


    Browse all Amana error codes: Amana Error Codes

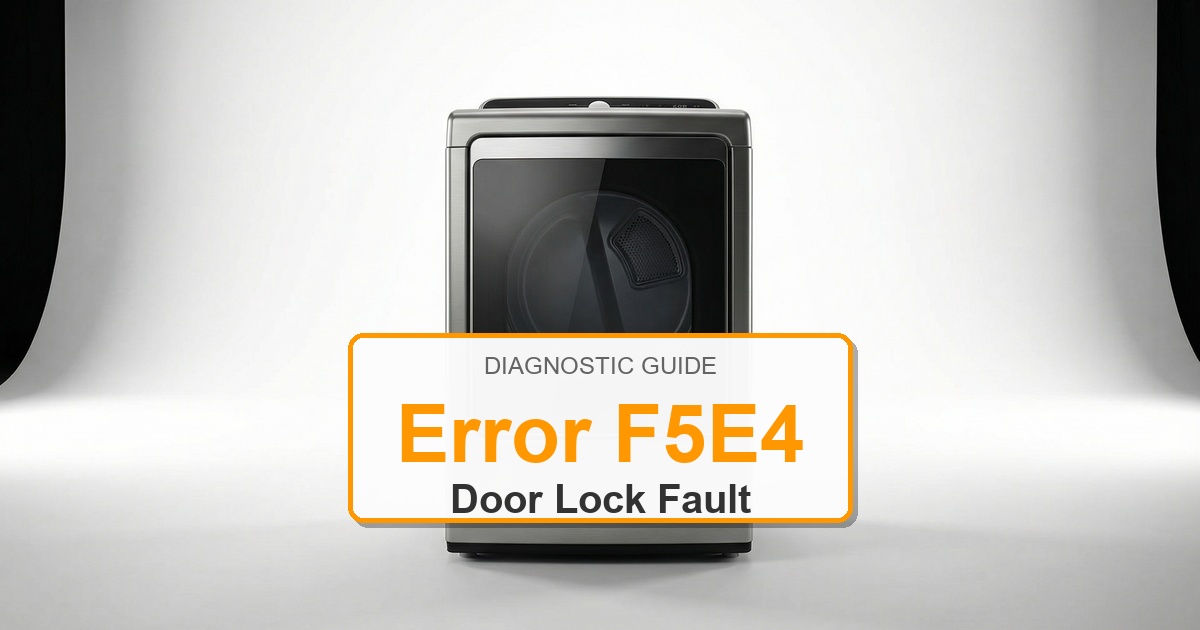
  • How to Fix Amana Dryer Error F5E4

    How to Fix Amana Dryer Error F5E4

    Error Code: F5E4 Difficulty: Easy

    Problem: Indicates that the door was not opened for 3 consecutive cycles.

    How to Fix F5E4 Error (Step-by-Step)

    1. This code indicates the dryer’s control board has not detected the door being opened for three straight cycles.
    2. Simply open the dryer door fully and confirm the error stays cleared during a full test cycle.
    3. Close the dryer door firmly, ensuring you hear a ‘click’ to indicate the latch has engaged.
    4. If the code persists after opening and closing the door, inspect the door latch and switch for any signs of damage or obstruction.
    5. Ensure the door is not sagging and that the latch aligns properly with the door strike on the dryer frame.
    6. Turn the appliance off, wait about 2 minutes, then turn it back on.
    7. Check for simple blockages (lint screen, drain path, or filter) and clean anything you find.

    What to Check Next on This Amana Dryer

    Focused repair path: dryer airflow, heating, sensor, motor, door switch, belt, and control checks. Do not treat a returning fault as a reset-only problem; use the point in the cycle where the fault appears to choose the next check.

    1. Disconnect power before inspection, then clear the lint screen, blower area, vent run, and exterior hood before replacing heat parts.
    2. Confirm whether the dryer starts, tumbles, heats, and advances through the cycle; the missing function narrows the repair path.
    3. For heat faults, inspect airflow first, then the thermal fuse, thermistor, element or gas ignition path, wiring, and control output.
    4. For start or tumble faults, check the door switch, belt switch, motor circuit, harness, and control connections before ordering parts.

    Check, inspect, clean, test, measure, remove, reconnect, clear, and replace parts only when the symptom supports that path. If these checks point toward a part, verify the complete Amana model number from the appliance tag before ordering. Similar error wording can use different valves, sensors, pumps, motors, heaters, locks, switches, fans, or control boards depending on the exact model.

    &tag=appliancefixg-20

    Verified Compatible Alternatives:

    • WP71002097

    When It’s Better to Replace Than Repair

    Dryer repairs are often worth it for small parts, but repeated heating, motor, drum, or control failures can point toward replacement.
    Confirm gas vs electric, venting, voltage, doorway clearance, and laundry-space dimensions before ordering.
    For repair parts, verify exact fit with the full dryer model number before buying; these links are general replacement-appliance shopping options.

    • [OK]Thermal fuse or heater failures keep returning
    • [OK]Belt, roller, or motor repairs exceed unit value
    • [OK]Door switch or control issues stack with other faults
    • [OK]Older dryer has long dry times even after vent cleaning

    Recommended Dryer Replacement Options

    Electric Dryers

    240V Vented Models

    • Most common electric replacement type
    • Confirm 3-prong vs 4-prong cord needs
    • Verify vent path and laundry-space depth

    Shop Electric Dryers

    Gas Dryers

    Natural Gas Dryer Options

    • Confirm gas supply and shutoff location
    • Use qualified installation when required
    • Do not substitute electric for gas without planning

    Compare Gas Dryers

    Compact and Ventless

    Small-Space Dryer Choices

    • Good for apartments and tight closets
    • Confirm ventless condensation requirements
    • Check capacity before replacing full-size units

    View Compact Dryers

    As an Amazon Associate, we earn from qualifying purchases.

    Still Not Working?
    If the replacement part didn’t fix the issue, you may have a wiring problem or main board failure.


    Browse all Amana error codes: Amana Error Codes

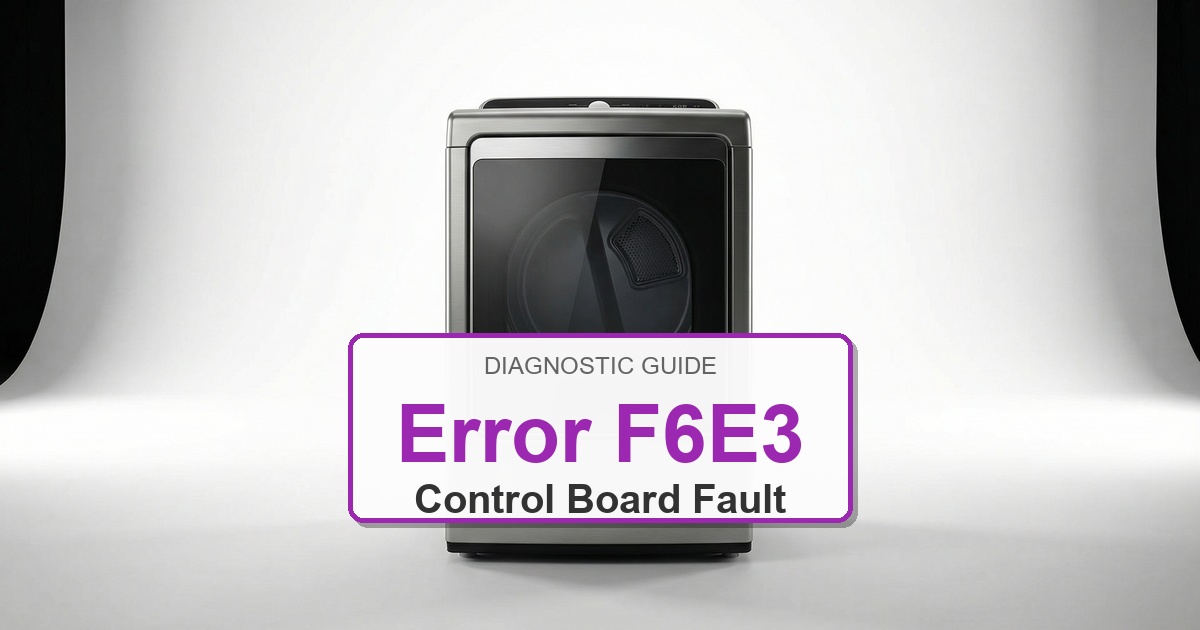
  • How to Fix Amana Dryer Error F6E3

    How to Fix Amana Dryer Error F6E3

    Error Code: F6E3 Difficulty: Hard

    Problem: Indicates an issue with the appliance control unit, user interface, or associated wiring.

    How to Fix F6E3 Error (Step-by-Step)

    1. Turn off the circuit breaker for the dryer or unplug it from the wall.
    2. Disassemble the control console area to get access to the user interface board.
    3. Remove the main service panel to locate the appliance control unit (main board).
    4. Visually inspect the wires that connect these two boards. Ensure the connectors are fully plugged in and that no wires are cut, burnt, or pinched.
    5. Reseat the connectors by unplugging them and plugging them back in firmly.
    6. Turn the appliance off, wait about 2 minutes, then turn it back on.
    7. Check for simple blockages (lint screen, drain path, or filter) and clean anything you find.

    What to Check Next on This Amana Dryer

    Focused repair path: dryer airflow, heating, sensor, motor, door switch, belt, and control checks. Do not treat a returning fault as a reset-only problem; use the point in the cycle where the fault appears to choose the next check.

    1. Disconnect power before inspection, then clear the lint screen, blower area, vent run, and exterior hood before replacing heat parts.
    2. Confirm whether the dryer starts, tumbles, heats, and advances through the cycle; the missing function narrows the repair path.
    3. For heat faults, inspect airflow first, then the thermal fuse, thermistor, element or gas ignition path, wiring, and control output.
    4. For start or tumble faults, check the door switch, belt switch, motor circuit, harness, and control connections before ordering parts.

    Check, inspect, clean, test, measure, remove, reconnect, clear, and replace parts only when the symptom supports that path. If these checks point toward a part, verify the complete Amana model number from the appliance tag before ordering. Similar error wording can use different valves, sensors, pumps, motors, heaters, locks, switches, fans, or control boards depending on the exact model.

    &tag=appliancefixg-20

    Verified Compatible Alternatives:

    • W10847936
    • W10875487
    • W11537215

    When It’s Better to Replace Than Repair

    Dryer repairs are often worth it for small parts, but repeated heating, motor, drum, or control failures can point toward replacement.
    Confirm gas vs electric, venting, voltage, doorway clearance, and laundry-space dimensions before ordering.
    For repair parts, verify exact fit with the full dryer model number before buying; these links are general replacement-appliance shopping options.

    • [OK]Thermal fuse or heater failures keep returning
    • [OK]Belt, roller, or motor repairs exceed unit value
    • [OK]Door switch or control issues stack with other faults
    • [OK]Older dryer has long dry times even after vent cleaning

    Recommended Dryer Replacement Options

    Electric Dryers

    240V Vented Models

    • Most common electric replacement type
    • Confirm 3-prong vs 4-prong cord needs
    • Verify vent path and laundry-space depth

    Shop Electric Dryers

    Gas Dryers

    Natural Gas Dryer Options

    • Confirm gas supply and shutoff location
    • Use qualified installation when required
    • Do not substitute electric for gas without planning

    Compare Gas Dryers

    Compact and Ventless

    Small-Space Dryer Choices

    • Good for apartments and tight closets
    • Confirm ventless condensation requirements
    • Check capacity before replacing full-size units

    View Compact Dryers

    As an Amazon Associate, we earn from qualifying purchases.

    Still Not Working?
    If the replacement part didn’t fix the issue, you may have a wiring problem or main board failure.


    Browse all Amana error codes: Amana Error Codes

  • How to Fix Amana Dryer Error F70

    How to Fix Amana Dryer Error F70

    Error Code: F70 Difficulty: Hard

    Problem: Communication failure between the user interface board and the main control board.

    How to Fix F70 Error (Step-by-Step)

    1. Begin by completely disconnecting the dryer from its power supply.
    2. Remove the necessary panels to access both the main control board and the user interface board in the console.
    3. Locate the communication cable that links the two boards and confirm the error stays cleared during a full test cycle.
    4. Carefully check the entire length of the cable for any visible signs of damage, like cuts or abrasions.
    5. Disconnect the cable from both the main board and the user interface board, then reconnect it, making sure the connections are secure and tight.
    6. If the error persists after checking the wiring, it signifies a critical failure in one of the boards, which will need to be professionally diagnosed and replaced.
    7. Turn the appliance off, wait about 2 minutes, then turn it back on.

    What to Check Next on This Amana Dryer

    Focused repair path: dryer airflow, heating, sensor, motor, door switch, belt, and control checks. Do not treat a returning fault as a reset-only problem; use the point in the cycle where the fault appears to choose the next check.

    1. Disconnect power before inspection, then clear the lint screen, blower area, vent run, and exterior hood before replacing heat parts.
    2. Confirm whether the dryer starts, tumbles, heats, and advances through the cycle; the missing function narrows the repair path.
    3. For heat faults, inspect airflow first, then the thermal fuse, thermistor, element or gas ignition path, wiring, and control output.
    4. For start or tumble faults, check the door switch, belt switch, motor circuit, harness, and control connections before ordering parts.

    Check, inspect, clean, test, measure, remove, reconnect, clear, and replace parts only when the symptom supports that path. If these checks point toward a part, verify the complete Amana model number from the appliance tag before ordering. Similar error wording can use different valves, sensors, pumps, motors, heaters, locks, switches, fans, or control boards depending on the exact model.

    &tag=appliancefixg-20

    Verified Compatible Alternatives:

    • W10847936
    • W10875487
    • W11537215

    When It’s Better to Replace Than Repair

    Dryer repairs are often worth it for small parts, but repeated heating, motor, drum, or control failures can point toward replacement.
    Confirm gas vs electric, venting, voltage, doorway clearance, and laundry-space dimensions before ordering.
    For repair parts, verify exact fit with the full dryer model number before buying; these links are general replacement-appliance shopping options.

    • [OK]Thermal fuse or heater failures keep returning
    • [OK]Belt, roller, or motor repairs exceed unit value
    • [OK]Door switch or control issues stack with other faults
    • [OK]Older dryer has long dry times even after vent cleaning

    Recommended Dryer Replacement Options

    Electric Dryers

    240V Vented Models

    • Most common electric replacement type
    • Confirm 3-prong vs 4-prong cord needs
    • Verify vent path and laundry-space depth

    Shop Electric Dryers

    Gas Dryers

    Natural Gas Dryer Options

    • Confirm gas supply and shutoff location
    • Use qualified installation when required
    • Do not substitute electric for gas without planning

    Compare Gas Dryers

    Compact and Ventless

    Small-Space Dryer Choices

    • Good for apartments and tight closets
    • Confirm ventless condensation requirements
    • Check capacity before replacing full-size units

    View Compact Dryers

    As an Amazon Associate, we earn from qualifying purchases.

    Still Not Working?
    If the replacement part didn’t fix the issue, you may have a wiring problem or main board failure.


    Browse all Amana error codes: Amana Error Codes

  • How to Fix Amana Dryer Error F7E1

    How to Fix Amana Dryer Error F7E1

    Error Code: F7E1 Difficulty: Easy

    Problem: Motor speed sensing error; the motor is not reaching the correct speed for the selected cycle.

    How to Fix F7E1 Error (Step-by-Step)

    1. Open the dryer door and check the load size. An overly large or heavy load can prevent the drum from spinning up to the correct speed.
    2. Untangle and redistribute the items inside the drum to ensure the load is balanced.
    3. Remove any items if the dryer is overloaded, then close the door firmly.
    4. Select a new cycle and press the ‘Start’ button and confirm the error stays cleared during a full test cycle.
    5. Turn the appliance off, wait about 2 minutes, then turn it back on.
    6. Check for simple blockages (lint screen, drain path, or filter) and clean anything you find.
    7. Make sure all doors, lids, and hoses are fully closed and seated correctly.

    What to Check Next on This Amana Dryer

    Focused repair path: dryer airflow, heating, sensor, motor, door switch, belt, and control checks. Do not treat a returning fault as a reset-only problem; use the point in the cycle where the fault appears to choose the next check.

    1. Disconnect power before inspection, then clear the lint screen, blower area, vent run, and exterior hood before replacing heat parts.
    2. Confirm whether the dryer starts, tumbles, heats, and advances through the cycle; the missing function narrows the repair path.
    3. For heat faults, inspect airflow first, then the thermal fuse, thermistor, element or gas ignition path, wiring, and control output.
    4. For start or tumble faults, check the door switch, belt switch, motor circuit, harness, and control connections before ordering parts.

    Check, inspect, clean, test, measure, remove, reconnect, clear, and replace parts only when the symptom supports that path. If these checks point toward a part, verify the complete Amana model number from the appliance tag before ordering. Similar error wording can use different valves, sensors, pumps, motors, heaters, locks, switches, fans, or control boards depending on the exact model.

    Recommended Parts to Check

    No exact official OEM part number is listed here because the correct Amana dryer part can vary by complete model number. These are targeted part-category searches, not universal fit claims.

    • Whirlpool dryer thermal fuse
      Common replacement category: Thermal fuse
      Fit note: Exact OEM part number varies by complete Amana dryer model number. Confirm compatibility before buying.
      Why this category can matter: no-heat or no-start symptoms after venting and power checks.

      Search Amazon for Whirlpool dryer thermal fuse

    • Whirlpool dryer heating element
      Common replacement category: Heating element
      Fit note: Exact OEM part number varies by complete Amana dryer model number. Confirm compatibility before buying.
      Why this category can matter: electric dryer no-heat symptoms after airflow checks.

      Search Amazon for Whirlpool dryer heating element

    • Whirlpool dryer control board
      Common replacement category: Electronic control board
      Fit note: Exact OEM part number varies by complete Amana dryer model number. Confirm compatibility before buying.
      Why this category can matter: cycle-control or repeated electronic faults after wiring checks.

      Search Amazon for Whirlpool dryer control board

    Before ordering: match the part to the complete Amana dryer model number on the appliance tag.

    When It’s Better to Replace Than Repair

    Dryer repairs are often worth it for small parts, but repeated heating, motor, drum, or control failures can point toward replacement.
    Confirm gas vs electric, venting, voltage, doorway clearance, and laundry-space dimensions before ordering.
    For repair parts, verify exact fit with the full dryer model number before buying; these links are general replacement-appliance shopping options.

    • [OK]Thermal fuse or heater failures keep returning
    • [OK]Belt, roller, or motor repairs exceed unit value
    • [OK]Door switch or control issues stack with other faults
    • [OK]Older dryer has long dry times even after vent cleaning

    Recommended Dryer Replacement Options

    Electric Dryers

    240V Vented Models

    • Most common electric replacement type
    • Confirm 3-prong vs 4-prong cord needs
    • Verify vent path and laundry-space depth

    Shop Electric Dryers

    Gas Dryers

    Natural Gas Dryer Options

    • Confirm gas supply and shutoff location
    • Use qualified installation when required
    • Do not substitute electric for gas without planning

    Compare Gas Dryers

    Compact and Ventless

    Small-Space Dryer Choices

    • Good for apartments and tight closets
    • Confirm ventless condensation requirements
    • Check capacity before replacing full-size units

    View Compact Dryers

    As an Amazon Associate, we earn from qualifying purchases.

    Still Not Working?
    If the replacement part didn’t fix the issue, you may have a wiring problem or main board failure.


    Browse all Amana error codes: Amana Error Codes